
User Manual
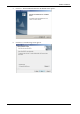
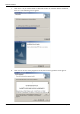
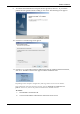
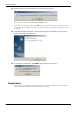
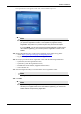
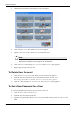
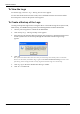
Table Of Contents
- Book 1: Setup & Maintenance
- Table of Contents
- Chapter 1
- Introduction
- Chapter 2
- Setting Up the System
- Setup Requirements
- Given Workstation
- DataRecorder and Cradle
- Storage Space for the PillCam Capsule Box
- Main Platform Components
- Connecting the Components
- Connecting the Given Workstation
- 1. Connect the Mouse cable to the Mouse connector.
- 2. Connect the Keyboard cable to the Keyboard connector.
- 3. Connect the monitor to the Workstation.
- 4. Connect the printer to the LPT connector or to the USB connector, depending on the printer’s connection cable.
- 5. If the Workstation’s voltage setting is manual, verify that the Workstation’s voltage matches the local voltage. If it does not, call Given Customer Support.
- 6. After voltage verification, connect the power cable of the Given Workstation to the electric outlet.
- 7. Connect the power cable of the monitor to the wall electric outlet.
- Connecting the DataRecorder Cradle
- Chapter 3
- Software Installation
- Chapter 4
- Multi-User Setup
- Chapter 5
- Technical Description
- System Labeling
- Essential Performance
- Warnings
- Cautions
- System Specifications
- PillCam SB Capsule
- PillCam SB 2 Capsule
- PillCam ESO 2 Capsule
- PillCam ESO 3 Capsule
- PillCam COLON 2 Capsule
- SensorArray DataRecorder 2
- SensorArray DataRecorder 3
- SB SensorBelt for DataRecorder 2 and DataRecorder 3
- DataRecorder 2 /2C
- Cradle DataRecorder 2
- DataRecorder 3
- Cradle DataRecorder 3
- DC Power Supply
- DataRecorder 3 Memory Card
- RAPID Software
- Guidance and Manufacturer's Declarations
- Chapter 6
- Maintenance
- Chapter 7
- Troubleshooting

PillCam Platform
34 Chapter 4
To View the Logs
To view the logs, click View Logs. The Log Viewer screen appears.
To view more details about one of the events, select and double click the relevant line and the
Event Properties screen of that specific action appears.
To Create a Backup of the Logs
Creating a backup of the logs involves saving the data to a removable storage device (such as CD,
Disk-On-Key, or USB Mass Storage Device) and deleting this data from the Workstation.
1. Connect your storage device or media to the Workstation.
2. Click Backup Logs. The Logs Backup screen appears.
3. Select the relevant removable disk from the list and click Backup. Both the Security Events
and the System Events are backed up through this command. The following message
appears:
4. Click OK.
The system will delete these files once they are backed up successfully onto a removable
device. To check this, click
View Logs again on the Given Workstation Manager screen. The
system log will be empty and the security log shows that the logs were backed up.
5. Click Log Off in the Given Workstation Manager window.
6. Click Yes to confirm exit.