
User's Manual
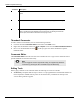
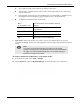
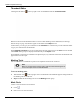
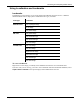
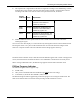
Table Of Contents
- User Manual
- RAPID® v8.3
- Table of Contents
- Chapter 1
- Using This Guide
- Chapter 2
- Indications, Contraindications, Warnings, Cautions
- Chapter 3
- Welcome to PillCam Capsule Endoscopy
- Chapter 4
- Preparing for PillCam Capsule Endoscopy
- Preparing the Patient
- Preparing the Required Equipment
- Creating Patient Instructions for the Procedure
- General Patient Guidelines During the Procedure
- Performing Patient Check-in
- Fitting Equipment on the Patient
- Chapter 5
- Know Your PillCam Recorder
- Chapter 6
- Performing PillCam Capsule Endoscopy
- Chapter 7
- Creating RAPID Videos
- Chapter 8
- Reviewing and Interpreting RAPID Videos
- Loading a Study with the Study Manager
- Using the Study Manager
- Overview of the RAPID Interface
- Using RAPID to View a Video
- RAPID Video Files
- Working with Findings
- Creating a PillCam Capsule Endoscopy Report
- RAPID Atlas
- Lewis Score
- Generating a Report
- Appendix A1
- Installing RAPID Software
- Appendix A2
- Configuring RAPID Software
- Appendix A3
- PillCam Equipment Maintenance
- Appendix A4
- Troubleshooting
- Appendix A5
- Technical Description
- System Labeling
- Essential Performance
- Warnings
- Cautions
- System Specifications
- PillCam SB 2 Capsule
- PillCam SB 3 Capsule
- PillCam UGI Capsule
- PillCam COLON 2 Capsule
- Sensor Array PillCam Recorder DR2
- Sensor Array PillCam Recorder DR3
- PillCam Recorder DR2/DR2C
- Cradle PillCam Recorder DR2
- PillCam Recorder DR3
- PillCam Recorder DR3 SDHC Memory Card
- Cradle PillCam Recorder DR3
- DC Power Supply
- RAPID for PillCam Software
- Guidance and Manufacturer's Declarations
- Index

Reviewing and Interpreting RAPID Videos
Using RAPID to View a Video 139
• The capsule track is segmented into the GI tract segments according to user landmarking: stomach,
small intestine, large intestine. The part of the GI tract that is already viewed becomes colored
according to the same color codes as on the lower part of the time bar, as follows:
• Defined landmarks on the capsule track are seen as small circles of the same color as the
underlying GI region.
You can move the video display to a certain location by clicking that location on the localization track.
Hovering the mouse over a point on the localization track for 2 seconds shows the images at that
location in a separate window. The time indication of these images appears at the top.
If instead of the localization track, a small sketch of the abdomen appears with a red X in the upper left
corner, this means that the Localization feature is not enabled due to the detection of a faulty sensor.
When viewing an ESO/UGI video, the PillCam logo appears instead of the localization track.
PillCam Progress Indicator
The PillCam Progress Indicator appears only:
• for SB videos,
• after you have landmarked the first duodenal image and the first cecal image,
• in automatic (A) mode for SB 2 and SB 3 (AFR) videos.
The PillCam Progress Indicator graphically presents the progress of reviewing the small bowel. The
slider on the left side shows an estimate of the percentage of the small bowel viewed.
Section
of GI tract
Color Explanation
Gastric Blue Indicates the stomach. The
entrance to the stomach is
marked by a blue dot.
Small
bowel
Orange Indicates the small bowel. The
entrance to the small bowel is
marked by a green dot.
Cecal Green Indicates the large intestine. The
entrance to the large intestine is
marked by a yellow dot.