
User's Manual
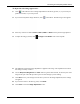

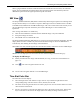
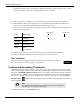
Table Of Contents
- User Manual
- RAPID® v8.3
- Table of Contents
- Chapter 1
- Using This Guide
- Chapter 2
- Indications, Contraindications, Warnings, Cautions
- Chapter 3
- Welcome to PillCam Capsule Endoscopy
- Chapter 4
- Preparing for PillCam Capsule Endoscopy
- Preparing the Patient
- Preparing the Required Equipment
- Creating Patient Instructions for the Procedure
- General Patient Guidelines During the Procedure
- Performing Patient Check-in
- Fitting Equipment on the Patient
- Chapter 5
- Know Your PillCam Recorder
- Chapter 6
- Performing PillCam Capsule Endoscopy
- Chapter 7
- Creating RAPID Videos
- Chapter 8
- Reviewing and Interpreting RAPID Videos
- Loading a Study with the Study Manager
- Using the Study Manager
- Overview of the RAPID Interface
- Using RAPID to View a Video
- RAPID Video Files
- Working with Findings
- Creating a PillCam Capsule Endoscopy Report
- RAPID Atlas
- Lewis Score
- Generating a Report
- Appendix A1
- Installing RAPID Software
- Appendix A2
- Configuring RAPID Software
- Appendix A3
- PillCam Equipment Maintenance
- Appendix A4
- Troubleshooting
- Appendix A5
- Technical Description
- System Labeling
- Essential Performance
- Warnings
- Cautions
- System Specifications
- PillCam SB 2 Capsule
- PillCam SB 3 Capsule
- PillCam UGI Capsule
- PillCam COLON 2 Capsule
- Sensor Array PillCam Recorder DR2
- Sensor Array PillCam Recorder DR3
- PillCam Recorder DR2/DR2C
- Cradle PillCam Recorder DR2
- PillCam Recorder DR3
- PillCam Recorder DR3 SDHC Memory Card
- Cradle PillCam Recorder DR3
- DC Power Supply
- RAPID for PillCam Software
- Guidance and Manufacturer's Declarations
- Index

PillCam Capsule Endoscopy
122 Overview of the RAPID Interface
Button Action
No image adjustment.
FICE 1, FICE 2, or FICE 3. FICE viewing tool aids the reader in observing tissue
surface characteristics and vascularity and by visually enhancing suspected
structures.
All FICE settings are available when viewing SB videos; only FICE 1 is available
when reviewing a COLON 2 video.
Blue Mode provides another view of the mucosa that may assist in the
interpretation process by rendering a bluish image to enhance contrast.
Clicking this button applies the factory presets for image adjustment:
Sharpness: 3; Brightness: 0; Color: 0.
Clicking this button AFTER you have made your own adjustments using the sliders
preserves your setting for the next time you click .
֠
֠֠
֠
Note
The image adjustment tools have not been cleared by FDA for polyp
diagnosis purposes.