
User's Manual
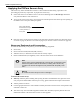
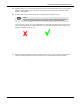
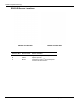

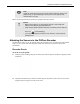
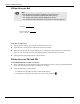
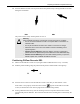
Table Of Contents
- User Manual
- RAPID® v8.3
- Table of Contents
- Chapter 1
- Using This Guide
- Chapter 2
- Indications, Contraindications, Warnings, Cautions
- Chapter 3
- Welcome to PillCam Capsule Endoscopy
- Chapter 4
- Preparing for PillCam Capsule Endoscopy
- Preparing the Patient
- Preparing the Required Equipment
- Creating Patient Instructions for the Procedure
- General Patient Guidelines During the Procedure
- Performing Patient Check-in
- Fitting Equipment on the Patient
- Chapter 5
- Know Your PillCam Recorder
- Chapter 6
- Performing PillCam Capsule Endoscopy
- Chapter 7
- Creating RAPID Videos
- Chapter 8
- Reviewing and Interpreting RAPID Videos
- Loading a Study with the Study Manager
- Using the Study Manager
- Overview of the RAPID Interface
- Using RAPID to View a Video
- RAPID Video Files
- Working with Findings
- Creating a PillCam Capsule Endoscopy Report
- RAPID Atlas
- Lewis Score
- Generating a Report
- Appendix A1
- Installing RAPID Software
- Appendix A2
- Configuring RAPID Software
- Appendix A3
- PillCam Equipment Maintenance
- Appendix A4
- Troubleshooting
- Appendix A5
- Technical Description
- System Labeling
- Essential Performance
- Warnings
- Cautions
- System Specifications
- PillCam SB 2 Capsule
- PillCam SB 3 Capsule
- PillCam UGI Capsule
- PillCam COLON 2 Capsule
- Sensor Array PillCam Recorder DR2
- Sensor Array PillCam Recorder DR3
- PillCam Recorder DR2/DR2C
- Cradle PillCam Recorder DR2
- PillCam Recorder DR3
- PillCam Recorder DR3 SDHC Memory Card
- Cradle PillCam Recorder DR3
- DC Power Supply
- RAPID for PillCam Software
- Guidance and Manufacturer's Declarations
- Index

Preparing for PillCam Capsule Endoscopy
Fitting Equipment on the Patient 59
3. Insert the PillCam recorder into its pouch. Instruct the patient to keep wearing the PillCam recorder
during the examination.
The pouch or belt is ready and the patient can wear it.
Positioning PillCam Recorder DR3
1. Make sure the PillCam recorder is on (navigation button LEDs blink once every 5 seconds).
2. With the patient standing, hang the pouch from the patient’s left shoulder to the right hip.
3. Insert the sensor connector into the PillCam recorder’s slot until you feel and hear a click.
If the sensor is not properly connected to the recorder, appears on the PillCam recorder
screen (see PillCam Recorder DR3 on page 209 for troubleshooting details).
4. If using a PillCam sensor array, tuck the vibrating connector component between the recorder
pouch and the patient's abdomen. This will ensure that the tactile vibrating alerts will be felt by the
patient.
!
Warning
When a PillCam recorder is connected to a sensor array worn by a patient:
• Do not connect the PillCam recorder to a computer that is connected to an
electrical outlet.
• Do not put the PillCam recorder into a cradle or connect it to a charger.
• Attach the sensor connector to the PillCam recorder immediately prior to
capsule ingestion.
• PillCam recorder DR3 only: make sure that the connector component is
placed between the patient’s body and the PillCam recorder DR3 waist strap.
• PillCam recorder DR2 only: if the blue LED is blinking before you open the
PillCam capsule box, reinitialize the PillCam recorder.
DR2 DR3
A
B