
User's Manual

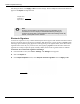
Table Of Contents
- User Manual
- RAPID® v8.3
- Table of Contents
- Chapter 1
- Using This Guide
- Chapter 2
- Indications, Contraindications, Warnings, Cautions
- Chapter 3
- Welcome to PillCam Capsule Endoscopy
- Chapter 4
- Preparing for PillCam Capsule Endoscopy
- Preparing the Patient
- Preparing the Required Equipment
- Creating Patient Instructions for the Procedure
- General Patient Guidelines During the Procedure
- Performing Patient Check-in
- Fitting Equipment on the Patient
- Chapter 5
- Know Your PillCam Recorder
- Chapter 6
- Performing PillCam Capsule Endoscopy
- Chapter 7
- Creating RAPID Videos
- Chapter 8
- Reviewing and Interpreting RAPID Videos
- Loading a Study with the Study Manager
- Using the Study Manager
- Overview of the RAPID Interface
- Using RAPID to View a Video
- RAPID Video Files
- Working with Findings
- Creating a PillCam Capsule Endoscopy Report
- RAPID Atlas
- Lewis Score
- Generating a Report
- Appendix A1
- Installing RAPID Software
- Appendix A2
- Configuring RAPID Software
- Appendix A3
- PillCam Equipment Maintenance
- Appendix A4
- Troubleshooting
- Appendix A5
- Technical Description
- System Labeling
- Essential Performance
- Warnings
- Cautions
- System Specifications
- PillCam SB 2 Capsule
- PillCam SB 3 Capsule
- PillCam UGI Capsule
- PillCam COLON 2 Capsule
- Sensor Array PillCam Recorder DR2
- Sensor Array PillCam Recorder DR3
- PillCam Recorder DR2/DR2C
- Cradle PillCam Recorder DR2
- PillCam Recorder DR3
- PillCam Recorder DR3 SDHC Memory Card
- Cradle PillCam Recorder DR3
- DC Power Supply
- RAPID for PillCam Software
- Guidance and Manufacturer's Declarations
- Index

Configuring RAPID Software
RAPID Settings 179
Use of the Electronic Signature
Once the electronic signature is activated, the signature will be displayed when creating or printing a
report. The signature will appear as electronically signed by: your first and last name, as it appears in
your user profile (in Windows).
As a result, whenever a report is saved, printed, exported or sent as an attachment by email, the
following screen appears.
Enter your login password and click
Sign.
Results Export and Patient Summary Sections
For both Results and Patient Summary Exports, the data can be exported to a drive directory (which
is pre-defined in Settings) or to a CD. Simply check the box Export to directory and type the location
to where to export. This can be done for both the Results Export and Patient Summary Export.
The checkbox Include video clips in export data will enable saving clips and images during export.
If
Export to directory is left unchecked a screen pops up prompting you to select a location to export
each time you export. When exporting the results or patient summary, a copy is also saved locally on the
computer.
Regimen Format Section
The Regimen Manager enables two convenient print layout options for the post-capsule ingestion
instructions. The desired default layout can be configured selecting either pocket format or page
format (see Print Layout of the Post-Capsule Ingestion Instructions on page 190).