
User Guide


GNU Image Manipulation Program
473 / 653
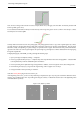
Now, we have an image with some blur we want to sharpen (black curve). We apply some more blur: the intensity variation will
be more gradual (green curve).
Let us substract the blurredness intensity from the intensity of the image. We get the red curve, which is more abrupt : contrast
and sharpness are increased. QED.
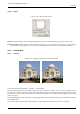
Unsharp mask has first been used in silver photography. The photograph fist creates a copy of the original negative by contact,
on a film, placing a thin glass plate between both; that will produce a blurred copy because of light diffusion. Then he places
both films, exactly corresponding, in a photo enlarger, to reproduce them on paper. The dark areas of the positive blurred film,
opposed to the clear areas of the original negative will prevent light to go through and so will be subtracted from the light going
through the original film.
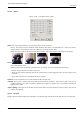
In digital photography, with GIMP, you will go through the following steps:
1. Open your image and duplicate it Image → Duplicate
2. In the copy, duplicate the layer Layer → Duplicate layer, then drop the Filters menu down and apply Blur → Gaussian Blur
to the duplicated layer with the default IIR option and radius 5.
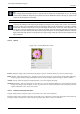
3. In the layer dialog of the duplicated image, change Mode to ‘Subtract’, and in the right-clic menu, select ‘Merge down’.
4. Click and drag the only layer you got into the original image, where it appears as a new layer.
5. Change the Mode in this layer dialog to ‘Addition’.
Voilà. TheUnsharp Mask plug-in does the same for you.
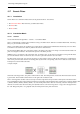
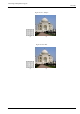
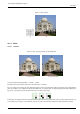
At the beginning of the curve, you can see a dip. If blurring is important, this dip is very deep; the result of the subtraction can be
negative, and a complementary color stripe will appear along the contrast, or a black halo around a star on the light background
of a nebula (black eye effect).
Figure 15.99: Black eye effect