
User Guide


GNU Image Manipulation Program
471 / 653
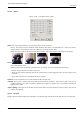
15.6.6.2 Options
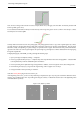
Figure 15.96: ‘Sharpen’ filter options
Preview Parameter setting results are interactively displayed in preview. Scroll bars allow you to move around the image.
Parameter setting Increase sharpness: slider and input boxes allow you to set sharpness (1-99) and you can judge result in
preview. By increasing sharpness, you may increase image blemishes and also create noise in graduated color areas.
15.6.7 Unsharp Mask
15.6.7.1 Overview
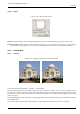
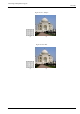
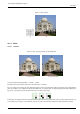
Figure 15.97: Applying example for the Unsharp Mask filter
(a) (b)
You can find this filter through Filters → Enhance → Unsharp Mask.
Out-of-focus photographs and most digitized images often need a sharpness correction. This is due to the digitizing process
that must chop a color continuum up in points with slightly different colors: elements thinner than sampling frequency will be
averaged into an uniform color. So sharp borders are rendered a little blurred. The same phenomenon appears when printing
color dots on paper.
The Unsharp Mask filter (what an odd name!) sharpens edges of the elements without increasing noise or blemish. It is the king
of the sharpen filters.
Some scanners apply a sharpen filter while scanning. It’s worth disabling it so that you keep control on your image.