
User Guide

GNU Image Manipulation Program
431 / 653
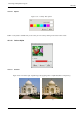
15.3.7.2 Options
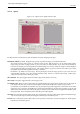
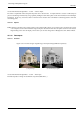
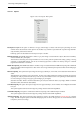
Figure 15.33: Options of the ‘Sample Colorize’ filter
The filter window is divided into two parts: Destination on the left, Sampling on the right.
Destination, Sample By default, displayed image previews reproduce the image you invoked the filter from.
The sample can be the whole preview, or a selection of this preview. With the drop list, you can select another sample-
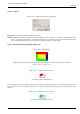
image among the names of images present on your screen when you called the filter. If you choose From Gradient (or
From Inverse Gradient), the selected gradient in Gradient Dialog (or its inverse) will be the sample. It will be displayed
into the gradient bar below the sample preview. The sampling preview is greyed out and two cursors allow you to select
the gradient range that will be applied to the image or selection.
Destination is, by default, the source image. The drop list displays the list of images present on your screen when you
evoked the filter and allow you to select another destination image. If there is a selection in this image, it will be gray-
scaled, else the whole preview will be gray-scaled.
Show Selection This option toggles between the whole image and the selection, if it exists.
Show Colors This option toggles between colors and gray-scale.
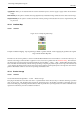
Get Sample Colors When you click on this button, the gradient bar below the sample preview displays colors of the sample. If
your sample holds few colors, transitions may be abrupt. Check Smooth Sample Colors option to improve them.
Use Subcolors is more difficult to understand. Let’s say first that in a greyscale image there is information only for Value
(luminosity, more or less light). In a RGB image, each pixel has information for the three colors and Value. So, pixels with
different color may have the same Value. If this option is checked, colors will be mixed and applied to Destination pixels
having that Value. If it is unchecked, then the dominating color will be applied.
Out Levels Two input boxes and two sliders act the same: they limit the color range which will be applied to destination image.
You can choose this range accurately. Result appears interactively in destination preview.
In Levels Three input boxes and three sliders allow to fix importance of dark tones, mid tones and light tones. Result appears
interactively in destination preview.