
User Guide


GNU Image Manipulation Program
34 / 653
Tip
In the Toolbox, as in most parts of GIMP, moving the mouse on top of something and letting it rest for a moment will
usually bring up a "tooltip" message that may help you understand what the thing is or what you can do with it. Also, in
many cases you can press the F1 key to get help about the thing that is underneath the mouse.
v
1
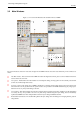
Toolbox Menu: This menu is special: it contains some commands that cannot be found in the menus that are attached to
images. (Also some that can.) These include commands for setting preferences, creating certain types of dialogs, etc. The
contents are described systematically in the Toolbox Menu section.
v
2
Tool icons: These icons are buttons which activate tools for a wide variety of purposes: selecting parts of images, painting
on them, transforming them, etc. The Toolbox Introduction section gives an overview of how to work with tools, and each
tool is described systematically in the Tools chapter.
v
3
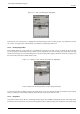
Foreground/Background colors: The color areas here show you GIMP’s current foreground and background colors, which
come into play in many operations. Clicking on either one of them brings up a color selector dialog that allow you to
change to a different color. Clicking on the double-headed arrow swaps the two colors, and clicking on the small symbol
in the lower left corner resets them to black and white.
v
4
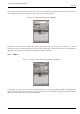
Brush/Pattern/Gradient The symbols here show you GIMP’s current selections for: the Paintbrush, used by all tools that
allow you to paint on the image ("painting" includes operations like erasing and smudging, by the way); for the Pattern,
which is used in filling selected areas of an image; and for the Gradient, which comes into play whenever an operation
requires a smoothly varying range of colors. Clicking on any of these symbols brings up a dialog window that allows you
to change it.
v
5
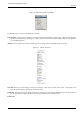
Active Image: (This is a new feature in GIMP 2.2) In GIMP, you can work with many images at once, but at any given
moment, one of them is the ‘active image’. Here you find a small iconic representation of the active image. Clicking on it
brings up a dialog with a list of all the currently open images, allowing you to make a different one active if you want to.
(Clicking on the window where the image is displayed will accomplish the same thing, though.)
Note
The "Active Image" preview is disabled by default. If you want it, you can enable it in the Toolbox Preferences
tab.
Note
At every start, GIMP selects a tool (the brush), a color, a brush and a pattern by default, always the same. If you want
GIMP to select the last tool, color, brush and pattern you used when quitting your previous session, check the "Set input
device settings on exit" in Preferences/Input Devices.