
User Guide


GNU Image Manipulation Program
319 / 653
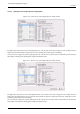
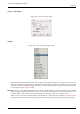
Figure 14.25: Colorspace menu
You can create the new image as either an RGB image or a grayscale image.
RGB color: The image is created in the Red, Green, Blue color system, which is the one used by your monitor or your
television screen.
Grayscale: The image is created in black and white, with various shades of gray. Aside from your artistic interests, this
type of image may be necessary for some plug-ins. Nevertheless, the GIMP allows you to change an RGB image into
grayscale, if you would like.
You cannot create an indexed image directly with this menu, but of course you can always convert the image to indexed
mode after it has been created. To do that, use the Image → Mode → Iindexed command.
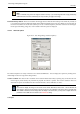
Fill
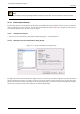
Figure 14.26: Fill menu
Here, you specify the background color that is used for your new image. It is certainly possible to change the background
of an image later, too. You can find more information about doing that in the Layer dialog.
• Fill the image with the current Foreground color, shown in the Toolbox.
• Fill the image with the current Background color, shown in the Toolbox.
• Fill the image with White.
• Fill the image with Transparency. If you choose this option, the image is created with an alpha channel and the back-
ground is transparent. The transparent parts of the image are then displayed with a checkered pattern, to indicate the
transparency.
Comment You can write a descriptive comment here. The text is attached to the image as a ‘parasite’, and is saved with the
image by some file formats (PNG, JPEG, GIF).
Note
With GIMP-2.2, you can’t edit this comment, but you can read it back by using the Info Window.
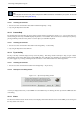
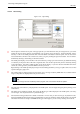
14.5.3 Open
The Open command activates a dialog that lets you load an existing image from your hard-drive or an external medium. For
alternative, and sometimes more convenient, ways of opening files, see the Files section.
14.5.3.1 Activating the Dialog
• You can access the Open dialog from the toolbox window or from an image window through: File → Open.
• You can also open the Dialog by using the keyboard shortcut Ctrl-O.