
User Guide


GNU Image Manipulation Program
278 / 653
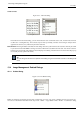
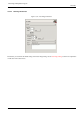
13.5.1.2 Using the Tools dialog
The most basic thing you can do is to select a tool by clicking on its icon: this has the same effect as clicking on an icon in the
Toolbox. You can do this in either List or Grid mode: the other functions of the dialog are available only in List mode.
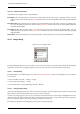
The most important function of the Tools dialog is to let you choose which tools to make visible in the Toolbox, by toggling the
‘eye’ icons that appear on the left side of each row in List mode. In particular, if you use the Color tools a lot, you may benefit
from toggling visibility on for them here.
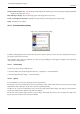
You can also change the order of tools in the Toolbox, by clicking on an item in the Tools dialog, in List mode, and dragging it
up or down in the list. If you screw things up, you can always press the "Reset" button at the bottom of the dialog, to restore the
defaults for order and visibility.
Right-clicking inside the dialog produces the Tools menu, which gives you an alternative way of toggling visibility or restoring
the defaults.
13.5.2 Preferences Dialog
13.5.2.1 Introduction
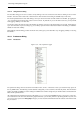
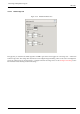
Figure 13.51: List of preference pages
The preferences dialog can be accessed from the Toolbox menu, as File → Preferences. It lets you customize many aspects of
the way GIMP works. The following sections detail the settings that you can customize, and what they affect. This information
applies specifically to GIMP 2.2, but the settings for GIMP 2.0 are similar enough that you should be able to understand them
based on the explanations here.
All of the Preferences information is stored in a file called gimprc in your personal GIMP directory, so if you are a ‘power user’
who would rather work with a text editor than a graphical interface, you can alter preferences by editing that file. If you do, and
you are on a Linux system, then man gimprc will give you a lot of technical information about the contents of the file and what
they are used for.