
User Guide


GNU Image Manipulation Program
261 / 653
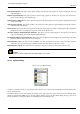
13.3.4.2 Using the Gradients dialog
The most basic, and most commonly used, operation with the dialog is simply to click on one of the gradients in the scrollable
list, in order to make it GIMP’s current gradient, which will then be used by any operation that involves a gradient.
If you double-click on a gradient, you open the Gradient Editor where you will be able to edit its name. Note, however, that you
are only allowed to change the names of gradients that you have created yourself, not the ones that come pre-installed with GIMP.
If you try to rename a pre-installed gradient, you will be able to edit the name, but as soon as you hit return or click somewhere
else, the name will revert to its original value. It is a general rule that you cannot alter the resources that GIMP pre-installs for
you: brushes, patterns, gradients, etc; only ones that you create yourself.
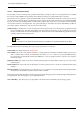
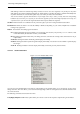
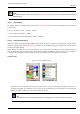
Grid/List modes In the Tab menu, you can choose between View as Grid and View as List. In Grid mode, the gradients are laid
out in a rectangular array. They look quite dazzling when viewed this way, but it is not very easy to pick the one you want,
because of visual interference from the neighboring ones. In List mode, the more usable default, the gradients are lined up
vertically, with each row showing its name.
Note
In the Tab menu, the option Preview Size allows you to adapt the size of gradient previews to your liking.
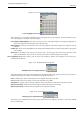
The buttons at the bottom of the dialog allow you to operate on gradients in several ways:
Edit Gradient This button activates the Gradient Editor.
New Gradient This creates a new gradient, initialized as a simple grayscale, and activates the Gradient Editor so that you can
alter it. Gradients that you create are automatically saved in the gradients folder of your personal GIMP directory,
from which they are automatically loaded when GIMP starts. (You can change this folder, or add new ones, using the
Preferences dialog.)
Duplicate Gradient This creates a copy of the currently selected gradient. You will be able to edit the copy even if you cannot
edit the original.
Delete Gradient This removes all traces of the gradient, if you have permission to do so. It asks for confirmation before doing
anything.
Refresh Gradients If you add gradients to your personal gradients folder by some means other than this dialog, this button
causes the list to be reloaded, so that the new entries will be available.
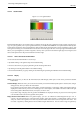
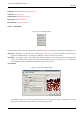
The functions performed by these buttons can also be accessed from the dialog pop-up menu, activated by right-clicking anywhere
in the gradient list. The menu also gives you one additional function:
Save as POV-Ray... This allows you to save the gradient in the format used by the POV-Ray 3D ray-tracing program.