
User Guide


GNU Image Manipulation Program
246 / 653
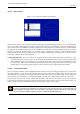
Duplicate Path "Duplicate Path" creates a copy of the active path, assigns it a unique name, adds it to the list in the Paths dialog,
and makes it the active path for the image. The copy will be visible only if the original path was visible.
Note
Note that copying a visible path will make the path "disappear" from the image display: this happens because
paths are drawn in XOR mode, which has the curious property that drawing an item twice "undraws" it. The paths
are still there even though you don’t see anything: if you move one of them, you will be able to see both.
Delete Path Delete Path deletes the current selected path.
Merge Visible Paths Merge Visible Paths takes all the paths in the image that are visible (that is, all that show "open eye"
symbols in the Paths dialog), and turns them into components of a single path. This may be convenient if you want to
stroke them all in the same way, etc.
Path to Selection; Add to Selection; Subtract from Selection; Intersect with Selection These commands all convert the ac-
tive path into a selection, and then combine it with the existing selection in the specified ways. ("Path to Selection" discards
the existing selection and replaces it with one formed from the path.) If necessary, any unclosed components of the path
are closed by connecting the last anchor point to the first anchor point with a straight line. The "marching ants" for the
resulting selection should closely follow the path, but don’t expect the correspondence to be perfect.
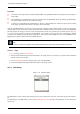
Selection to Path This operation can be accessed in several ways:
• From an image menubar, as Select → To Path
• From the Paths dialog menu, as Selection to Path.
• From the Selection to Path button at the bottom of the Paths dialog.
• From the Selection to Path button in the Tool Options for the Path tool.
Selection to Path creates a new path from the image’s selection. In most cases the resulting path will closely follow the
"marching ants" of the selection, but the correspondence will not usually be perfect.
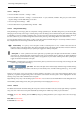
Converting a two-dimensional selection mask into a one-dimensional path involves some rather tricky algorithms: you can
alter the way it is done using the Advanced Options, which are accessed by holding down the Shift key while pressing the
Selection to Path button at the bottom of the Paths dialog. This brings up the Advanced Options dialog, which allows you
to set 20 different options and variables, all with cryptic names. The Advanced Options are really intended for developers
only, and help with them goes beyond the scope of this documentation. Generally speaking, Selection to Path will do what
you expect it to, and you don’t need to worry about how it is done (unless you want to).
Stroke Path This operation can be accesssed in several ways:
• From an image menubar, as Edit → Stroke Path
• From the Paths dialog menu, as Stroke Path.
• From the Stroke Path button at the bottom of the Paths dialog.
• From the Stroke Path button in the Tool Options for the Path tool.
‘Stroke Path’ renders the active path on the active layer of the image, permitting a wide variety of line styles and stroking
options. See the section on Stroking for more information.
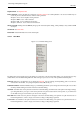
Copy Path Copy Path copies the active path to the Paths Clipboard, enabling you to paste it into a different image.
Tip
You can also copy and paste a path by dragging its icon from the Paths dialog into the target image’s display.