
User Guide


GNU Image Manipulation Program
244 / 653
13.2.3.1 Dialog call
• From the Toolbox menu: File → Dialogs → Paths.
• From the Toolbox menu: File → Dialogs → Create New Dock → Layers, Channels, and Paths. This gives you a dock contain-
ing three dialogs, with the Paths dialog one of them.
• From an image menu: Dialogs → Paths.
• From the Tab menu in any dockable dialog: Add Tab → Paths.
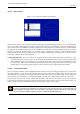
13.2.3.2 Using the Paths dialog
Each path belongs to one image: paths are components of images just like layers. The Paths dialog shows you a list of all paths
belonging to the currently active image: switching images causes the dialog to show a different list of paths. If the Paths dialog
is embedded in a "Layers, Channels, and Paths" dock, you can see the name of the active image in the Image Menu at the top of
the dock. (Otherwise, you can add an Image Menu to the dock by choosing "Show Image Menu" from the Tab menu.)
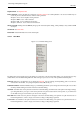
If you are familiar with the Layers dialog, you have a head start, because the Paths dialog is in several ways similar. It shows a
list of all paths that exist in the image, with four items for each path:
Path visibility An ‘open eye’ icon if the path is visible, or a blank space if it is not. "Visible" means that a trace of
the path is drawn on the image display. The path is not actually shown in the image pixel data unless it has been stroked or
otherwise rendered. Clicking in the eye-symbol-space toggles the visibility of the path.
chain paths A ‘chain’ symbol is shown to the right of the eye-symbol-space if the path is transform-locked, or a blank
space if it is not. ‘Transform-locked’ means that it forms part of a set of elements (layers, channels, etc) that are all affected
in the same way by transformations (scaling, rotation, etc) applied to any one of them. Clicking in the chain-symbol-space
toggles the transform-lock status of the path.
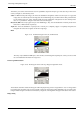
Preview image A small preview-icon showing a sketch of the path. If you click on the icon and drag it into an image, this will
create a copy of the path in that image.
path name The name of the path, which must be unique within the image. Double-clicking
on the name will allow you to edit it. If the name you create already exists, a number will be appended (e.g., "#1") to make
it unique.
If the list is non-empty, at any given moment one of the members is the image’s active path, which will be the subject of any
operations you perform using the dialog menu or the buttons at the bottom: the active path is shown highlighted in the list.
Clicking on any of the entries will make it the active path.
Right-clicking on any entry in the list brings up the Paths Menu. You can also access the Paths Menu from the dialog Tab menu.
Du kan klikke på alle innslaga i lista, eller gå inn på fanemenyen for å få tilgang til banemenyen.
13.2.3.3 Buttons
The buttons at the bottom of the Paths dialog all correspond to entries in the Paths menu (accessed by right-clicking on a path list
entry), but some of them have extra options obtainable by holding down modifier keys while you press the button.
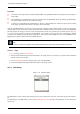
New Path See New Path. Holding down the Shift key brings up a dialog that allows you to assign a name to the new (empty)
path.
Raise Path See Raise Path.
Lower Path See Lower Path.