
User Guide


GNU Image Manipulation Program
231 / 653
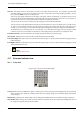
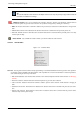
Overview This dialog window is opened when you click on the image with the Text Tool. It’s a still basic text editor that
nevertheless allows you to write on several lines. Word wrap is not possible - the text layer lengthens gradually - and you
have to press the Enter key to move to the next line.
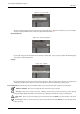
The text you type appears interactively in the image. If the option ‘Show Layer Boundary’ is checked in the View menu,
this text will be surrounded with black and yellow dashes that mark the layer boundary. Now look, it’s not a selection: if
you want to move the text, you must click on the text itself and not inside this frame only.
You can correct the text you are writing and you can change the text font with the Font Editor.
You can move the text by using the Move Tool, but you loose the Editor then. You can re-edit this text as you will see now.
As soon as you start writing, a Text layer is created in the Layer Dialog. On an image with such a layer (the image you are
working on, or a .xcf image), you can resume text editing by activating this text layer then clicking on it (double click).
To add another text to your image click on a non-text layer: a new Text Editor will appear and a new text layer will be
created. To pass from a text to another one activate the corresponding text layer and click on it to activate the editor.
Load Text from File Text can be loaded from a text file by clicking the folder icon in the text editor.
Clear all Text Clicking this icon clears the editor and the associated text on the image.
From Left to Right This option causes text to be entered from left to right, as is the case with most Western languages and may
Eastern languages.
From Right to Left This option allows text to be entered from right to left, as is the case with some Eastern languages, such as
Arabic (illustrated in the icon).
Note
See also
Text and fonts.
12.7 Color and Indicator Area
12.7.1 Color Area
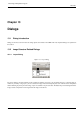
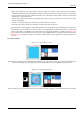
Figure 12.88: Color area in the Toolbox Palette
Color area This area shows GIMP’s basic palette, consisting of two colors, the Foreground and Background, used for painting,
filling, and many other operations. Clicking on either of the color displays brings up a Color Editor dialog, which permits
you to change it.
Default colors Clicking on this small symbol resets the Foreground and Background colors to black and white, respectively.
Swap FG/BG colors Clicking on the small curved line with two arrowheads causes the Foreground and Background colors to
be swapped. Pressing the x key has the same effect.