
User Guide


GNU Image Manipulation Program
174 / 653
Incremental The Incremental checkbox activates incremental mode for the tool. If it is deactivated, the maximum effect of a
single stroke is determined by the opacity, and moving the brush repeatedly over the same spot will not increase the effect
beyond this limit. If Incremental is active, each additional pass with the brush will increase the effect, but the opacity can’t
exceed the opacity set for the tool. This option is available for all brush tools except those which have a ‘rate’ control,
which automatically implies an incremental effect. See also Section
8.2.
Hard Edge Activating this option causes fuzzy brushes to be treated as though they were black-and-white, and inactivates sub-
pixel anti-aliasing. The consequence is that all pixels affected by the tool are affected to the same degree. This is often
useful if you work at a very high zoom level, and want to have precise control of every single pixel.
‘Hard edge’ is available for all brush tools except the painting tools (Pencil, Paintbrush, and Airbrush), where it would be
redundant, because giving a hard edge to the Paintbrush or Airbrush would simply make them behave like the Pencil tool.
12.3.1.3 Further Information
Advanced users may be interested to know that brush tools actually operate at a sub-pixel level, in order to avoid producing
jagged-looking results. One consequence of this is that even if you work with a hard-edged brush, such as one of the Circle
brushes, pixels on the edge of the brushstroke will only be partially affected. If you need to have all-or-nothing effects (which
may be necessary for getting a good selection, or for cutting and pasting, or for operating pixel-by-pixel at a high zoom level),
there are two things you can do: (1) for painting, use the Pencil tool, which makes all brushes perfectly hard and disables
sub-pixel anti-aliasing, or (2) for other types of brush tools, check the ‘Hard edge’ box in the Tool Options.
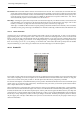
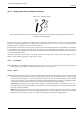
12.3.2 Bucket Fill
Figure 12.18: Toolbox Fill
This tool fills a selection with the current foreground color. If you Shift+click and use the Bucket tool, it will use the background
color instead. Depending on how the tool options are set, the Bucket Fill tool will either fill the entire selection, or only parts
whose colors are similar to the point you click on. The tool options also affect the way transparency is handled.
The amount of fill depends on what Fill Threshold you have specified. The fill threshold determines how far the fill will spread
(similar to the way in which the magic wand works). The fill starts at the point where you click and spreads outward until the
color or alpha value becomes ‘too different’.
When you fill objects in a transparent layer (such as letters in a text layer) with a different color than before, you may find that a
border of the old color still surrounds the objects. This is due to a low fill-threshold in the Bucket Fill options dialog. With a low
threshold, the bucket tool won’t fill semi-transparent pixels, and they will stand out against the fill because they have kept their
original color. If you want to fill areas that are totally transparent, you have to choose right-click|Select|Select All, and make sure
that the layer’s ‘Keep Transparency’ button (in the Layers dialog) is unchecked. If the Keep Transparency button is checked,
only the opaque parts of the layer will be filled, and if you don’t use the Select All command, only the opaque ‘island’ that you
clicked on will be filled.