
User`s manual


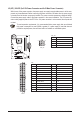
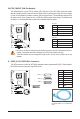

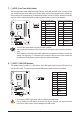
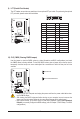

Table Of Contents
- GA-G41MT-S2 Motherboard Layout
- Chapter 1 Hardware Installation
- Chapter 2 BIOS Setup
- 2-1 Startup Screen
- 2-2 The Main Menu
- 2-3 MB Intelligent Tweaker(M.I.T.)
- 2-4 Standard CMOS Features
- 2-5 Advanced BIOS Features
- 2-6 Advanced Chipset Features
- 2-7 Integrated Peripherals
- 2-8 Power Management Setup
- 2-9 PnP/PCI Configurations
- 2-10 PC Health Status
- 2-11 Load Fail-Safe Defaults
- 2-12 Load Optimized Defaults
- 2-13 Set Supervisor/User Password
- 2-14 Save & Exit Setup
- 2-15 Exit Without Saving
- Chapter 3 Drivers Installation
- Regulatory Statements
Hardware Installation - 18 -
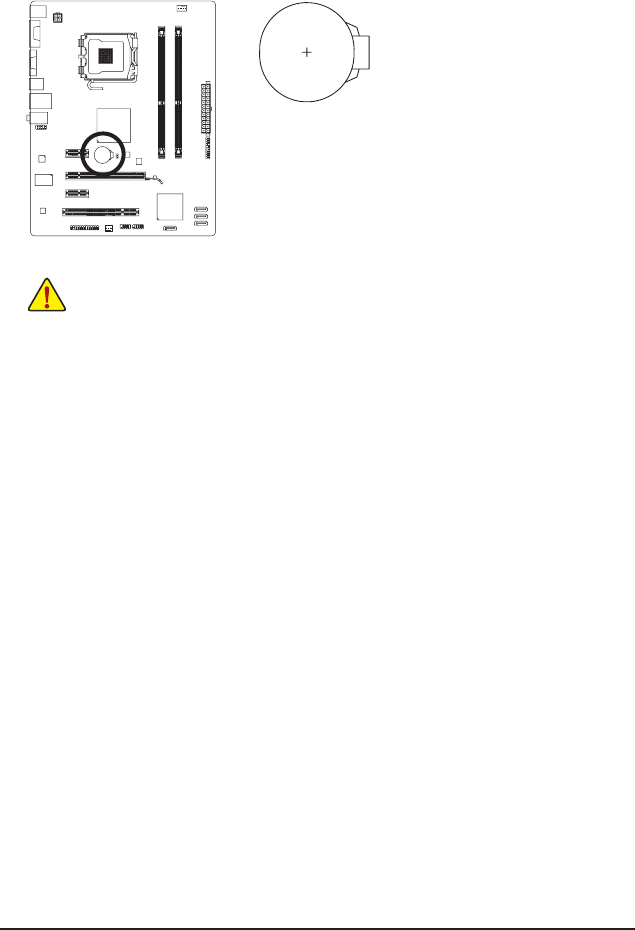
11) BATTERY
The battery provides power to keep the values (such as BIOS congurations, date, and time information)
in the CMOS when the computer is turned off. Replace the battery when the battery voltage drops to a
low level, or the CMOS values may not be accurate or may be lost.
You may clear the CMOS values by removing the battery:
1. Turn off your computer and unplug the power cord.
2. Gently remove the battery from the battery holder and wait for one
minute. (Or use a metal object like a screwdriver to touch the positive
and negative terminals of the battery holder, making them short for 5
seconds.)
3. Replace the battery.
4. Plug in the power cord and restart your computer.
• Always turn off your computer and unplug the power cord before replacing the battery.
• Replace the battery with an equivalent one. Danger of explosion if the battery is replaced with
an incorrect model.
• Contact the place of purchase or local dealer if you are not able to replace the battery by your-
self or uncertain about the battery model.
• When installing the battery, note the orientation of the positive side (+) and the negative side (-)
of the battery (the positive side should face up).
• Used batteries must be handled in accordance with local environmental regulations.