
User`s manual


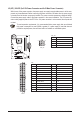
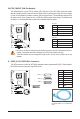

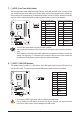
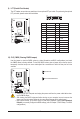
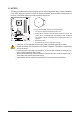

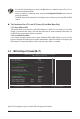
Table Of Contents
- GA-G41MT-S2 Motherboard Layout
- Chapter 1 Hardware Installation
- Chapter 2 BIOS Setup
- 2-1 Startup Screen
- 2-2 The Main Menu
- 2-3 MB Intelligent Tweaker(M.I.T.)
- 2-4 Standard CMOS Features
- 2-5 Advanced BIOS Features
- 2-6 Advanced Chipset Features
- 2-7 Integrated Peripherals
- 2-8 Power Management Setup
- 2-9 PnP/PCI Configurations
- 2-10 PC Health Status
- 2-11 Load Fail-Safe Defaults
- 2-12 Load Optimized Defaults
- 2-13 Set Supervisor/User Password
- 2-14 Save & Exit Setup
- 2-15 Exit Without Saving
- Chapter 3 Drivers Installation
- Regulatory Statements
Hardware Installation - 12 -
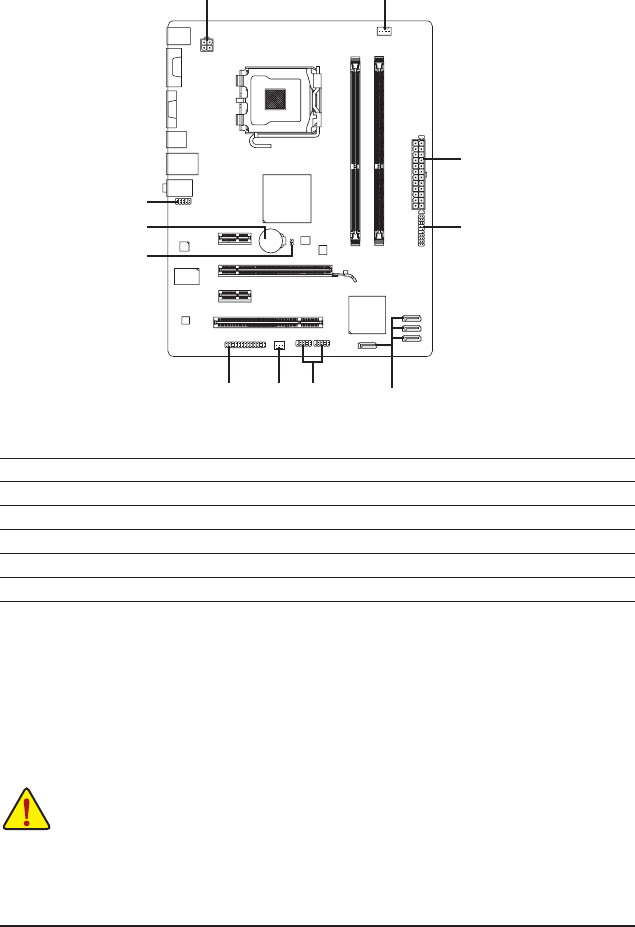
1-7 Internal Connectors
Read the following guidelines before connecting external devices:
• First make sure your devices are compliant with the connectors you wish to connect.
• Before installing the devices, be sure to turn off the devices and your computer. Unplug the
power cord from the power outlet to prevent damage to the devices.
• After installing the device and before turning on the computer, make sure the device cable has
been securely attached to the connector on the motherboard.
1) ATX_12V
2) ATX
3) CPU_FAN
4) SYS_FAN
5) SATA2_0/1/2/3
6) F_PANEL
7) F_AUDIO
8) F_USB1/F_USB2
9) LPT
10) CLR_CMOS
11) BATTERY
1
2
4
3
9 5
7
11
6
8
10