
User's Manual


3
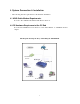
2-3 Connection for Ethernet User
Step 1. Please prepare an Ethernet cable (RJ- 45) first.
Step 2. Connect the Ethernet cable to the WAN port of the GN-BR402W.
Step 3. Connect an end of the network cable to the ADSL/Cable Modem of the Ethernet
connection port.
Note: Please check if the light of the WAN port of the GN-BR402W is lit. If not, try to
use the cross over (RJ - 45) Ethernet cable that comes with this product.
Step 4. Connect any port of the area network LAN1, 2, 3, & 4 of the GN-BR402W to your PC.
Step 5. Connect the adapter to the power connection slot of the GN-BR402W.
Step 6. Insert the adapter to the power socket.
Step 7. The connection procedure is completed.
2-4 Connection for USB Port User (If you use USB connection, please refer
to this section.)
Please repeat Steps 1~3 of Section 2-3.
Step 4. Connect the USB transmission cable to the USB port of the GN -BR402W and the USB
port at the PC end.
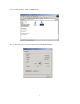
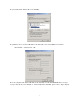
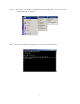
Step 5. Please install the USB driver program by the CD that comes with the GN -BR402W.
(Please refer to Appendix B for the installation of the USB driver program).
2-5 Connection for PCMCIA Wireless Adapter User
Please repeat Steps 1~3 of Section 2-3.
If you were using wireless connection , please refer to the wireless card manual which provider by
your wireless card manufature . After installing and setting the PCMCIA Wireless Adapter , refer to
PC configuration section in Chapter 3 , follow the instruction step by step to finish the TCP/IP
Protocol setting (Setting PC) .
Note: The SSID of the PCMCIA Wireless Adapter should be the same as the SSID of GN-BR402W.
The default value is “gigabyte” (or “any”, if your Wireless LAN Card can support.), please do notice
the form of the SSID value whether is capital or not.