
User's Manual


52
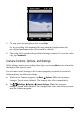
NOTE: By default, the display area blanks out and shows the word “Standby” when the
camera has been idle for one minute. To resume, tap the screen.
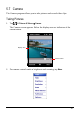
3. Aim the camera lens at the subject. Press the program button 1 (the one
labeled ) for automatic focusing. A white frame appears. Wait until the
color of the frame turns green indicating the subject is in focus.
4. Press the navigation stick to take the picture.
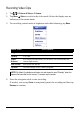
5. The result shows on the screen if the picture was taken in Normal or Timer
mode. At this time, you can tap Menu to perform a desired task to the
current picture. Tap Camera or ok to go back to the Camera screen.
6. The picture is saved to the predefined storage location (as long as you didn‘t
delete it in the previous step).
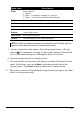
Menu Items
Descriptions
Mode
Three choices:
1. Normal
2. Burst – Continuous shooting of 5 pictures
3. Timer – 5 second countdown before shooting
Brightness
Seven brightness levels
Resolution
Six choices from 160x120 to 2048x1536 (640x480 by default)
Zoom
Available choices depend on the resolution.
White
Balance
Five choices from which you can select one that matches the
current light source.
Full Screen
Full screen on and off.
Options
Overall settings to the Camera program.