
Product Manual


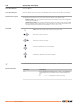


Table Of Contents
- 1 Safety Directions
- 2 Description of the System
- 3 User Interface
- 4 Operation
- 5 Settings
- 6 Tools
- 7 Working with interfaces
- 8 Care and Transport
- 9 Technical Data
- 10 Software Licence Agreement
- 11 Glossary
- Appendix A Menu Tree
- Appendix B Directory Structure

03851_001
1
2
3
1
1
6
7
5
4
5
5
1 Extend the tripod legs to allow for a comfortable working posture. Position the tripod over
the marked ground point, centring it as best as possible.
2 Fasten the tribrach and instrument onto the tripod.
3 Turn on the instrument, and, if tilt correction is set on, the laser plummet activates auto-
matically, and the Level up screen appears. Otherwise, tap on Level/Face icon in status
bar.
4 Move the tripod legs (1) and use the tribrach footscrews (6) to center the plummet (4) over
the ground point.
5 Adjust the tripod legs (5) to level the tubular level (7).
6 Use the electronic level and turn the tribrach footscrews (6) to level the instrument pre-
cisely.
7 Center the instrument precisely over the ground point by shifting the tribrach on the tripod
plate (2).
8 Repeat steps 6 and 7 until the required accuracy is achieved.
The electronic level can be used to level up the instrument precisely by using the footscrews of
the tribrach.
1 Turn the instrument until the tubular level is parallel to two footscrews.
2 Center the level on the instrument approximately by turning the footscrews of the tribrach.
3 Turn on the instrument, and, if tilt correction is set on, the laser plummet activates auto-
matically, and the Level up screen appears. Otherwise, tap on Level/Face icon in status
bar.
4 Center the electronic level for the first axis by turning the two footscrews.
5 Center the electronic level for the second axis by turning the last footscrew.
☞
When the electronic level is centered and
both axes are within the tolerance limit,
the instrument has been levelled up.
6 Accept with OK.
Setup step-by-step
Level up with the elec-
tronic level step-by-step
Operation 27