
Instructions


CONVERSION INSTRUCTIONS FOR GENIE® & OVERHEAD DOOR®
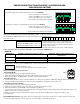
FIXED CODE DIP SWITCHES
What do xed code dip switches look like and how do I convert them to button presses on my new universal remote?
If you have a group of 9 switches with 3 positions per switch (TRINARY):
• Switch in the UP position = Press button 1
• Switch in the MIDDLE position = Press button 2
• Switch in the DOWN position = Press button 4
In this example, the button presses would be:
If you have a group of 9-12 switches with 2 positions per switch (BINARY):
+
-
1 2 3 4 5 6 7 8 9 10 11 12
STEP 1: Each shaded box below represents a DIP switch position. In these boxes, write in the number 1, 2 or 4 as it corresponds to
the UP, MIDDLE or DOWN switch position you see on the remote, opener head or receiver.
Convert the code:
Each box should contain a 1, 2, or 4. Each box should
correspond to the position of the switch on your remote
opener head or receiver. If you have less than 12 switches,
only ll in what you have.
*You will need to reference this section in STEP 3.4 below.
STEP 2: Determine which specication/combination you have from the CHART B below:
BRAND NAME NUMBER OF SWITCHES/POSSIBLE POSITIONS NUMBER OF TIMES TO PRESS THE BUTTON OF
YOUR CHOICE
Genie®
12 switches with 2 possible positions (UP, DOWN) 1
9 switches with 2 possible positions (UP, DOWN) 2
Overhead Door® 9 switches with 3 possible positions (UP, MIDDLE, DOWN) 3
Circle the number of button presses in Chart B above or write it below. This will tell your remote what brands/spec’s you have.
STEP 3: Programming the Universal Remote:
CHART B
This box should say 1, 2 or 3.
*You will need to reference this section in STEP 3.9 below.
In this example, the button presses would be:
• Switch in the UP position = Press button 1
• Switch in the DOWN position = Press button 4
ENTER LEARN MODE:
1. On the universal remote, press and hold down button #1.
2. While still holding down button #1, press button #4 on the universal remote four times.
3. Release both buttons - The WHITE LED on the remote will quickly ash 4 times.
ENTER DIP SWITCHES:
4. *On the universal remote, enter in order the numbers 1, 2 or 4 as you have written in STEP 1. The LED lights with each button press.
5. After the last DIP switch position entry, simply wait for the BLUE LED to quickly ash 4 times and go out.
ENTER BUTTON SELECTION MODE:
6. On the universal remote, press and hold down button #2.
7. While still holding down button #2, press button #3 on the universal remote four times.
8. Release both buttons - the BLUE LED on the remote will begin ashing.
9. *Press the button of your choice on the universal remote the required number of times indicated from Chart B in STEP 2 above. You
will have 10 seconds to complete your entry.
10. After your press(es), simply wait the remainder of the 10 seconds - the BLUE LED will give a long blink and then go out.
11. Test the remote.
FIG.1
1 2
3 4
• Switch in the UP position = write a “1”
• Switch in the MIDDLE position = write a “2”
• Switch in the DOWN position = write a “4”
4 1 1 1 1 1 1 14 4 4 4
PROGRAMMING ASSISTANCE: If the opener does not activate after the steps shown, repeat steps or contact Customer Care by web-
site chat (www.geniecompany.com) or by phone at: 1-800-354-3643 for programming assistance.
+
0
-
1 2 3 4 5 6 7 8 9
4 41 1 1 1 1 22