
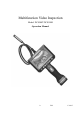
User's Manual


7 V0.2 131015
Following below steps, users are allowed to download and upload files from the inspection unit to a
computer via USB 2.0:
1. Press on screen on the screen to turn on the screen.
2. Connect the screen to a computer using a USB cable.
3. “USB Disk” will be displayed on the LCD screen, and two portable disk (the internal memory and
external Micro SD card) will be recognized by the computer. The inspection unit now works as an U-disk.
● Video Output to TV
To view real time image from a TV, connect the VIDEO OUT port of the unit with the VIDEO IN port
of the TV using a video cable, select the right signal to review the image on TV..
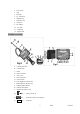
●How to work
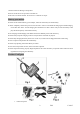
1、How to operate the grip:
a 、 Hold key for 2s, power on the grip, the green LED flashes ( Note: when low battery, green LED
flashes and then the unit power off automatically).
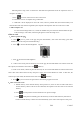
b、Press to increase the LED brightness.(Fig.13).
c、Press decrease the LED brightness.
d、Under review mode, press the shoot key once on the grip, the red LED flashes once and the screen will
take a photo ( this function is the same as the function)
e、Under review mode, continue to press the shoot key for 2s. The red LED flashes two times and the screen
enters video state. When release the key and press it again, the red LED flashes two times. At this time, the
screen stops to take video( this function is the same as the function)
f、Press key for 2 seconds. The green LED is off and the grip power turns off.
2、How to view the screen
a. Default memory is the internal memory when powered on, users can also use Micro SD card as
external memory. When a Micro SD card detected, the inspection will store files in the external
memory.
b. Press to enter preview mode in which users can preview images.
c. Press to take pictures manually (press the shoot key can do the same function), files will be
stored in internal memory or Micro SD card automatically. (Note: when Auto Capture is OFF, press