TABLE OF CONTENTS 1. FEATURES................................................................ 1 2. SPECIFICATIONS...................................................... 2 2-1 General Specifications......................................... 2 2-2 Electrical Specifications........................................3 A. Air velocity....................................................... 3 B. Temperature.................................................... 3 3. FRONT PANEL DESCRIPTION.................................
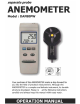
1. FEATURES * Microprocessor circuit assures maximum possible accuracy, provides special functions and features. * The portable anemometer provides fast, accurate * * * * * * * * * * * * readings, with digital readability and the convenience of a remote vane probe separately. Multi display units for air velocity measurement : m/s, km/h, ft/min, knots. mile/h. Dual temperature display unit : 蚓 and 蚌. Low-friction ball vane wheels is accurate in both high & low velocity. Thermistor sensor for Temp.
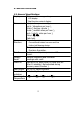
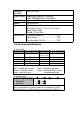
2. SPECIFICATIONS 2-1 General Specifications Display * 51 mm x 32 mm supper large LCD display. * Dual function meter's display. Measurement m/s ( meters per second ), km/h ( kilometers per hour ), ft/min ( feet/per minute ), knots ( nautical miles per hour ), mph ( mile/h, miles per hour ), Temp.- 蚓, 蚌., Data hold. Sensor Air velocity sensor : Structure Conventional twisted van arm and low friction ball bearing design.
Operating Max. 80% RH. Humidity Power Supply Heavy duty type DC 9V battery, 006P, MN1604(PP3) or equvalent. Power Current Approx. DC 8.3 mA. Weight 220 g/0.48 LB. Size Main instrument: 200 x 68 x 30 mm ( 7.9 x 2.7 x 1.2 inch ). Vane Probe Head: Accessories Round, 72 mm Dia. Instruction manual...................... 1 PC. Vane probe............................... 1 PC. Carrying case, CA-06................... 1 PC. 2-2 Electrical Specifications A. Air velocity Measurement Range m/s 0.4 - 25.
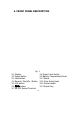
3. FRONT PANEL DESCRIPTION Fig.
4. MEASURING PROCEDURE 4-1 Air velocity/Temperature measurement 1 )Install the " Probe Plug " ( 3-13, Fig. 1 ) into the " Input Socket " ( 3-8, Fig. 1 ). 2) Power ON the meter by pressing the " Power Button " ( 3-2, fig. 1 ). 3) a. Select the desired air velocity unit ( m/s, km/h, mph, knots, ft/min ) by pusing the " unit Button " ( 3-5, fig. 1 ). b. Select the desired temperature units by pusing the " 蚓/蚌 Button " ( 3-6, fig. 1 ). 4) Use the hand to hold the " Probe Handle " ( 3-12, Fig.
b. With the " REC " symbol on the display : * Press the " REC Button " ( 3-4, Fig. 1 ) once, the " REC Max " symbol along with the maximum value will appear on the display. Note : If intend to delete the maximum value, just press the " Hold Button " ( 3-3, Fig. 1 ) for a while, and then the display will show the " REC " symbol only & execute the memory function continuously. * Press the " REC. Button " ( 3-4, Fig. 1 ) again, the " REC Min " symbol along with the minimum value will appear on the display.
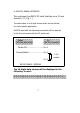
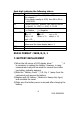
6. RS232 PC SERIAL INTERFACE The instrument has RS232 PC serial interface via a 3.5 mm terminal ( 3-7, Fig. 1 ). The data output is a 16 digit stream which can be utilized for user's specific application. A RS232 lead with the following connection will be required to link the instrument with the PC serial port. Meter (3.5 mm jack plug) PC (9W 'D" Connector) Center Pin............................. Pin 4 Ground/shield.......................... Pin 2 2.
Each digit indicates the following status : D0 D1 & D8 D9 D10 D11 & D12 D13 D14 D15 End Word Display reading, D1 = LSD, D8 = MSD For example : If the display reading is 1234, then D8 to D1 is : 00001234 Decimal Point(DP), position from right to the left 0 = No DP, 1= 1 DP, 2 = 2 DP, 3 = 3 DP ` Polarity 0 = Positive 1 = Negative Annunciator for Display 蚓 = 01 蚌 = 02 m/s = 08 Km/h = 10 ft/min = 11 mile/h = 12 knot = 09 When send the upper display data = 1 When send the lower display data = 2 4 Start Word