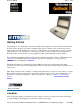
GoBook II Help Page 1 of 68 Getting Started Congratulations on your purchase of the Itronix GoBook II computer! Your new GoBook II features the most innovative advances in portable computing technology. It combines state-of-the-art ergonomics with a rugged, durable architecture to provide you with a notebook computer that is compact, powerful, rugged and easy to use.
GoBook II Help Page 2 of 68 STANDARD The Itronix GoBook II computer Battery ADP-90AB or ADP-75FB AC adapter with power cord 12.1 inch XGA display Stylus Shoulder Strap GoBook II Quick Start Guide OPTIONS The following items are normally optional, but some vendors may include them in the standard package. Some items may not be available in some countries, or some vendors may choose not to carry all the items.
GoBook II Help Page 3 of 68 Full Array of Ports and Connectors Your computer includes standard ports for connecting to peripherals such as USB devices and monitors. USB ports allow you to add many types of peripherals. Large SVGA or XGA LCD Your computer has a large, easy to view SVGA or XGA LCD panel. Built-in Microphone and Stereo Speakers The stereo speakers and internal microphone enable you to run a variety of multimedia applications.
GoBook II Help Page 4 of 68 optimum performance There is danger of explosion if the battery is incorrectly replaced. Replace only with the same or equivalent type recommended by the manufacturer. Dispose of used batteries according to the manufacturer's instructions. Do not open the RAM door by yourself. Unplug the computer from the power outlet before cleaning. Use a damp cloth for cleaning.
GoBook II Help Page 5 of 68 Adjusting the Volume Installing the Battery Make sure the computer is sheltered when you install the Lithium Ion battery; the computer is not weather sealed until the battery is properly installed. The battery should be fully charged before you operate the unit on battery power. To get the most from your battery, follow the guidelines in the Power Management section. To install the battery 1. Remove the battery door. 2.
GoBook II Help Page 6 of 68 If you need to leave the system for a short time, or if you want to conserve battery power, you can suspend the computer by pressing FN+F3. See Power Management for additional information. Suspend to RAM In a suspend to RAM, the contents of your computer's memory are held intact, while almost all the components in your computer either turn off completely, or reduce power consumption to a minimum.
GoBook II Help Page 7 of 68 CAUTION Always use an approved stylus or your finger. Never use sharp, hard, or abrasive implements on the touch screen such as ball point pens, pencils, or keys. They could damage the screen. To clean the touch screen panel, apply a household glass cleaner to a soft, clean, dry cloth and wipe the screen. Calibrating the touch screen To calibrate the touch screen, open the Calibration Applet by selecting Start, Programs, Mobile Computer Tools, Touch Screen Calibrator.
GoBook II Help Darken the display Page 8 of 68 FN+F6 Setting the Date and Time To set the date and time 1. Tap the Start button, Settings, Control Panel, and double-tap the Date / Time icon. 2. From the Date / Time Properties menu, make changes to the Time and Date, and then close this screen by selecting OK. 72_0103_003 10 December 2002 © 2002 Itronix Corporation. All rights reserved. GoBook II™ Help Startup Problems? If your computer does not operate, try these solutions.
GoBook II Help Page 9 of 68 Getting Familiar with Your Computer The GoBook II computer is a ruggedized , weather-sealed laptop computer system built for the demanding environment of the mobile worker. Designed for use by mobile workforces, this computer is a superior work tool for collecting, managing, and communicating information in the field. The following pages describe the external and internal features of your GoBook II computer.
GoBook II Help Page 10 of 68 Back View Cooling Fan Power Jack 15-Pin VGA Port 60-Pin Multi-IO Port 9-Pin Serial Port 6. PS2 Port 7. RJ-11 Modem Jack 8. RJ-45 Network Jack 9. USB Port 10. D-Rings file://C:\Documents%20and%20Settings\harwoodm.ITRXNT1\Local%20Settings\Temp\~...
GoBook II Help Page 11 of 68 Left Side View 1. PC Card Slot 2. Microphone Jack 3. Audio Jack 4. Stylus Right Side View 1.Antenna 2. Media Bay - CDROM, DVD, Floppy Disk, CDRW, or Media Bay Battery 3. Radio Bay 4. Cooling Fan 5. Security Slot file://C:\Documents%20and%20Settings\harwoodm.ITRXNT1\Local%20Settings\Temp\~...
GoBook II Help Page 12 of 68 Display with Stylus LED Activity Indicators The activity indicators, located above the keyboard, light up when a particular function of the computer is active. Each indicator is marked with a corresponding symbol and is visible when the lid is open or closed. LED numbers are from left to right. Icon & LED # Function LED Not used Lit Not used Lit Disk Status (HW) Lit LED #1 LED #2 LED #3 file://C:\Documents%20and%20Settings\harwoodm.ITRXNT1\Local%20Settings\Temp\~...
GoBook II Help Page 13 of 68 Media Drive Lit Bay LED #4 Number Lock Lit LED #5 Caps Lock Lit Scroll Lock Lit LED #6 LED #7 LED Power / Wireless Modem Indicators The case front LED’s indicate external power, unit ON/OFF, battery status, and wireless modem ON/OFF. The indicators remain active and viewable even when the LCD panel is closed. Icon Function LED External Green Power LED off Green Power Flashing Green Green Battery Flashing Green LED off Green Wireless Flashing Green Modem LED off .
GoBook II Help Page 14 of 68 Keyboard Basics The keyboard on the GoBook II computer looks much like the keyboard of a typewriter and operates in almost the same way. While typewriter keys put characters on paper, the keys on the laptop enter characters in the computer and perform certain functions, depending on the application or program.
GoBook II Help Page 15 of 68 The LEFT ARROW key usually moves the cursor one character position to the left. Function Keys Hold the FN key while pressing the numbered function key. Function key Description Toggles display FN+F1 on / off Toggles between LCD / FN+F2 CRT displays Suspend to RAM / FN+F3 HDD Decreases LCD FN+F6 brightness Increases LCD FN+F7 brightness Decrease FN+F8 volume Increase FN+F9 volume Mutes the FN+F10 audio Numeric Keypad The numeric keypad is embedded in the keyboard area.
GoBook II Help Page 16 of 68 1. First, place your fingers on the keyboard in the normal typing position. The touchpad is easily accessible by moving either your left or right thumb off the space bar and on to the touchpad. 2. Gently move your thumb across the touchpad in the direction you want the cursor to move. The pad detects the change in pressure and moves the cursor in the corresponding direction. NOTE The touchpad on your GoBook II computer is electrically sensitive to finger touch.
GoBook II Help Page 17 of 68 NOTE To change the speed of the mouse, from the Start Menu select Settings, Control Panel, and then choose Mouse to make adjustments. Scrolling Buttons If you are scrolling through a document, you may it find the scrolling button more restful to your hand than holding down a mouse button. The scrolling button is located between the touchpad buttons. Push the top of the button to scroll up in a document or Web page; press the bottom of the button to scroll down.
GoBook II Help Page 18 of 68 video signal cable from the external monitor to the monitor port. 2. Connect the monitor’s power cable to a power outlet and turn on the monitor. 3. If the new monitor has not automatically been detected and is not displaying what appears on your GoBook II’s LCD screen, open the Control Panel. 4. Double-tap Display. The Display Properties window opens. 5. Tap the Settings tab. Then select the Advanced button. 6.
GoBook II Help Page 19 of 68 2. Place the disk on the tray, label side up. 3. Place the disk on the central spindle and press gently until the disk clicks into place. 4. Slide back the tray until it clicks shut. Removing a CD-ROM or DVD-ROM Disk 1. Make sure the computer is not accessing the CD-ROM/DVD-ROM drive. 2. Press the button on the front of the drive and pull the tray all the way out. 3. Pick up the CD-DVD by the edges and remove the CD-ROM/DVD-ROM from the tray.
GoBook II Help Page 20 of 68 cleaning kits. Do not bend or drop the discs. Do not place objects on top of discs. CAUTION do not insert any foreign objects into the disc tray. Do not force the tray to open or close manually. When not in use, keep the tray closed to prevent dust or dirt from entering the drive unit. If you experience difficulty when removing a CD/DVD disc, stretch a paper clip (or use a pin or a thin metal rod) and insert it into the emergency eject hole located on the front panel.
GoBook II Help Page 21 of 68 2. PC Cards require drivers, or a program that allows the operating system to use a specific device. Many drivers are included with Windows, but if not, you will be prompted to install the driver included with your card. NOTE Please read the instructions included with individual PC Cards. Some cards may be inserted with power on, while others require that the computer be turned off. Removing a PC Card 1.
GoBook II Help Page 22 of 68 1 DC-in Jack Connect the DC power cable from the AC adapter to this jack. 2 VGA Out (External Video) Port The 15-pin monitor can connect your computer to an external monitor. 3 Multi-I/O Port The 60-pin Multi-IO port is provided so you can connect the GoBook II to an optional cradle or office dock. 4 Serial Port The 9-pin serial port can be used to connect your computer to serial devices such a a fax/modem or a serial mouse.
GoBook II Help Page 23 of 68 8 USB (Universal Serial Bus) Port The USB is latest standard for attaching input devices, scanners, and other devices to a PC. USB devices can be chained together on a single cable. USB is 1.1 compliant. 72_0103_003 10 December 2002 © 2002 Itronix Corporation. All rights reserved. GoBook II™ Help Left Side Connectors Hover the mouse over each number on the picture to see a description 1 PC-Card Slot Use this slot to connect PCMCIA-card devices.
GoBook II Help Page 24 of 68 72_0103_003 10 December 2002 © 2002 Itronix Corporation. All rights reserved. GoBook II™ Help Right Side Connector Hover the mouse over the number on the picture to see a description. 1 Security Slot Your computer has a Security Slot that can be used with a standard laptop locking device, such as a Kennsington Lock. You can connect the GoBook II to a large object with the lock to prevent theft of your GoBook.
GoBook II Help Page 25 of 68 could impair call quality, damage the phone, or result in violation of FCC regulations. The GoBook II (IX260) contains the following radio. The following statements are relevant when using this radio: Research In Motion 902 Mobitex In order to comply with FCC RF Exposure requirements, A 1.5 cm spacing should be maintained between the Antenna on the Right side of the LCD display and the user/bystander’s body .
GoBook II Help Page 26 of 68 This Page left Blank. 72_0103_003 10 December 2002 © 2002 Itronix Corporation. All rights reserved. GoBook II™ Help Rim 902D For specific information about your Rim 902D radio please refer to the manufacturer's documentation. Research In Motion 902 Mobitex 72_0103_003 10 December 2002 © 2002 Itronix Corporation. All rights reserved. GoBook II™ Help 1. This Page left Blank. 72_0103_003 10 December 2002 © 2002 Itronix Corporation. All rights reserved.
GoBook II Help Page 27 of 68 The GoBook II has power management capability so you can reduce the amount of energy used, especially during periods of inactivity. Effective use of power management options can greatly conserve and extend your battery life. GoBook II™ Help Battery Calibration BIOS Level Battery Calibration The first time you use a battery, you should calibrate it. The calibration process empties and charges the battery.
GoBook II Help Page 28 of 68 CAUTION Do not disconnect AC power while Battery Calibration is running. If AC remains disconnected for more than two minutes, the application will terminate. CAUTION Do not remove the battery while Battery Calibration is running. Doing so will cause the application to terminate immediately. 72_0103_003 10 December 2002 © 2002 Itronix Corporation. All rights reserved.
GoBook II Help Page 29 of 68 Save your work and then select Shut Down from the Start menu Turn off the computer (or suspend to disk) and replace the discharged battery with a charged battery (See Changing the Battery) NOTE Do not restart the computer until you have connected to an AC adapter, or replaced the discharged battery with a charged battery. 72_0103_003 10 December 2002 © 2002 Itronix Corporation. All rights reserved.
GoBook II Help Page 30 of 68 In a suspend to RAM, the contents of your computer’s memory are held intact, while most of the components in your computer either turn off completely, or reduce power consumption to a minimum. In a Suspend to RAM, your computer remains active but with the minimum possible power consumption. Return the computer to full power by pressing any key. A fully-charged battery can maintain a Suspend to RAM for many hours.
GoBook II Help Page 31 of 68 1. Turn off the computer. 2. Disconnect external power . 3. Close the display and turn the computer over. 4. Rotate the latches on the battery door to the open position and remove the door. Remove the battery. 5. Make sure the replacement battery is properly orientated. Insert the battery into the battery compartment. Check that the latches lock back into position. 6. Charge the new battery by plugging the computer into AC power.
GoBook II Help Page 32 of 68 optimized default settings for normal use. GoBook II™ Help Using the Setup Utility The Setup Utility allows you to configure your computer’s basic settings. When you turn your computer on, the system reads this information to initialize the hardware so that it can operate correctly. You can use the Setup Utility to change your computer’s start-up configuration. For example, you can change your system's security routine.
GoBook II Help Page 33 of 68 Standard CMOS Setup Advanced CMOS Setup Power Management Setup Peripheral Setup Stealth Mode Setup Auto-Detect Hard Disks Change User Password Change Supervisor Password Save Settings and Exit, and Exit Without Saving are used to exit the Setup Utility.
GoBook II Help F10 Page 34 of 68 Saves changes, then exits 72_0103_003 10 December 2002 © 2002 Itronix Corporation. All rights reserved. GoBook II™ Help Standard CMOS Setup The Standard CMOS Setup page of the Setup Utility has a list of fields that describe the basic configuration of your computer. CMOS is simply a type of Non-Volatile Memory used to store the basic configuration of the computer.
GoBook II Help Pri. Master Sec. Master System Memory; Extended Memory Page 35 of 68 Auto User Not Installed Auto ATAPI CD-ROM Not Installed The default setting is Auto. Auto lets the system automatically read setup information from the device. The default setting is Auto. Auto lets the system automatically read setup information from the device. When set to Auto, the BIOS will automatically detect hard disk capacity.
GoBook II Help Page 36 of 68 GoBook II™ Help Advanced CMOS Setup Field Bootup Sequence Setting C; A; CDROM S.M.A.R.T. for Hard A; C; CDROM CDROM; A; C; Disabled Enabled Bootup NumLock Display Expansion Mode Password Check Off On Enabled Disabled Setup Always Function Use this field to set the devices from which the system should boot in order of priority. The default value is C; A; CDROM,.
GoBook II Help Page 37 of 68 10 December 2002 © 2002 Itronix Corporation. All rights reserved. GoBook II™ Help Power Management Setup This section of the Setup Utility manages power settings. To save power, you may select the time the computer may idle before going into standby, or a low power state, then into suspend mode. See Power Management for an introduction to suspend modes.
GoBook II Help Page 38 of 68 72_0103_003 10 December 2002 © 2002 Itronix Corporation. All rights reserved. GoBook II™ Help Peripheral Setup Settings on this page allow you to change port configurations. Field Internal MDC Modem Onboard Serial Port A & B Setting Auto Disabled Function Default is disabled. Auto COM 1 is assigned to the serial port located at the rear of your GoBook II. Set this field to Auto to enable the system to automatically assign an I/O address and interrupt to the port.
GoBook II Help Parallel Port IRQ Parallel Port DMA Parallel Port Mode Page 39 of 68 378 278 3BC 5 7 0 1 3 Normal Bi-dir EPP 1.9 EPP 1.7 ECP This is the default address setting. Optional address setting. Optional address setting. Only available with addresses 378, 278 and 3BC Only available in ECP mode Normal Bi-directional Enhanced Parallel Port Enhanced Parallel Port Extended Capabilities Port 72_0103_003 10 December 2002 © 2002 Itronix Corporation. All rights reserved.
GoBook II Help Field LEDs Fan System Beeps Audio Page 40 of 68 Setting On Off On Off On Off On Off Display Brightness On Off Function LEDs function normally LEDs are disabled The fan functions normally The Fan is disabled. Heat management is then controlled solely through throttling. Beeps are heard during POST The system beeper is disabled during the boot up or resume process. Audio is preserved across suspend/resume and boot. The default volume level is set to mid range.
GoBook II Help Page 41 of 68 72_0103_003 10 December 2002 © 2002 Itronix Corporation. All rights reserved. GoBook II™ Help Change Password Change Supervisor Password A supervisor password must be set before a lower-level password can be set. After selecting Change Supervisor Password, press Enter. You will be prompted for the new password, and then again to verify it. Type in six or fewer keystrokes. If you make an error, press Esc to start over.
GoBook II Help Page 42 of 68 72_0103_003 10 December 2002 © 2002 Itronix Corporation. All rights reserved. GoBook II™ Help Exit and Saving Save Settings and Exit Select this option to save changes to the field values and restart the computer using the new values. Pressing F10 from any of the menu screens also allows you to save settings and exit. Exit Without Saving Select this option to discard any changes you have made to the field values and restart the computer using the old values.
GoBook II Help Page 43 of 68 suppressors advertising high performance surge protection; only a few of them actually provide adequate protection. This section provides guidelines for selecting a quality surge suppressor to be used with your GoBook II, and it helps identify a few sources for products with acceptable performance. Selecting the Right Surge Protection Consider the level of quality you need when selecting a surge suppressor.
GoBook II Help Page 44 of 68 The devices that will be attached to the computer also need to be surge protected. 72_0103_003 10 December 2002 © 2002 Itronix Corporation. All rights reserved. GoBook II™ Help Vehicle Adapter The Vehicle Adapter is an optional device that supplies power from the vehicle battery to operate the computer and charge the battery installed in the unit. It typically connects to the vehicle battery using the cigarette lighter socket.
GoBook II Help Page 45 of 68 GoBook II™ Help Vehicle Cradle The vehicle cradle is a vehicle-based docking station designed to safely secure the computer in the vehicle. A standard key lock located on the front of the cradle locks the computer onto the cradle for security purposes.
GoBook II Help Page 46 of 68 1. Place the computer onto the vehicle cradle, making sure it is securely latched. 2. If charging is required it begins automatically. The Battery Power Indicator flashes. 3. When the battery is fully charged, the Battery Power Indicator remains steady. Important A temperature of 5°C to 50°C (41°F to 22°F) is required when charging batteries with the vehicle cradle. Batteries will not charge successfully outside this temperature range.
GoBook II Help Page 47 of 68 Cleaning or Replacing Cradle Contact Pins The contact pins on the vehicle cradle are exposed to contamination and stress when the computer is installed and removed from the cradle during normal daily operation. If the pins become dirty, they can be removed and cleaned as necessary using electrical contact cleaner. Or they can be replaced. The power and ground pins are pins 3 and 8 respectively.
GoBook II Help Page 48 of 68 "Warming internal hard drive. Please wait...". The unit will continue booting when it detects the HDD is warm enough to operate safely. NOTE If you are using the computer in a cold temperature environment and the battery level is too low for the heater to operate, you will see the error message "Battery too low to warm the hard drive. Shutting down..." and the computer will shut down. Apply external power and reboot.
GoBook II Help Page 49 of 68 Store the battery within the recommended temperature range: 10°C to 30°C (50°F to 86°F). Unused or stored batteries can lose power over time. When you install a battery that has not been used for awhile, connect external power to the computer and charge the battery. After storage, battery calibration may increase its capacity. 72_0103_003 10 December 2002 © 2002 Itronix Corporation. All rights reserved.
GoBook II Help Page 50 of 68 5. Reinstall the battery. Display Periodically inspect the display to make sure the brightness function is operating properly and that all pixels are operational. To clean your touch screen To clean the display assembly, use the same cleaning solution and procedure described earlier for the outside case. In some cases, you can use a small amount of isopropyl alcohol to remove streaks or smears. Use a soft, clean cloth to clean the display.
GoBook II Help Page 51 of 68 4. Remove the battery from the unit and store it in a dry place. 5. Store the computer within the recommended temperature ranges of -40°C to +75°C (-40°F to +167°F). If you use PC cards, refer to the manufacturer’s instructions you received with the card for storage and care information. 72_0103_003 10 December 2002 © 2002 Itronix Corporation. All rights reserved.
GoBook II Help Page 52 of 68 3. On the left side of the hard drive cassette you will see a small black release lever. Pull the lever towards you (away from the direction of the RTC hatch) and slide the cassette out into the battery storage area. 4. Lift the hard drive cassette from the battery storage area. To install the hard drive: 1. Make sure the unit is shut down and external power is removed. 2. The battery door should be off the unit and the battery removed. 3.
GoBook II Help Page 53 of 68 Periodically backup or archive important files and data. External PC Card Hard Drives Each PC Card hard drive manufacturer provides specific guidelines for the care and handling of the product. In addition, follow these recommendations: When the PC Card hard drive is not inserted in a PC Card socket, store the hard drive in a protective carrying case. This will help protect it from inadvertent shocks. Always use care when handling the hard drive.
GoBook II Help Page 54 of 68 Always use an approved stylus or your finger. Never use sharp, hard, or abrasive implements on the touch screen such as ball point pens, pencils, or keys. They could damage the screen. To clean the touch screen panel, apply a household glass cleaner to a soft, clean, dry cloth and wipe the screen. 72_0103_003 10 December 2002 © 2002 Itronix Corporation. All rights reserved.
GoBook II Help Page 55 of 68 contact your supervisor or your organization’s help desk. Fixed disk controller failure Disk controller is not responding. Report this error to your supervisor or your organization's help desk. Fixed disk failure Report this error to your supervisor or your organization's help desk. GA20 Error Hardware failure. Report this error to your supervisor or your organization's help desk.
GoBook II Help Page 56 of 68 contact your supervisor or your organization’s help desk. Press the F1 key to resume This message indicates that an error was found during POST. Pressing the F1 key allows the system to attempt to boot. CPU Fan Error Report the error to your supervisor or your organization's help desk. Battery too low to warm the hard drive. Shutting down... There is not enough battery power to operate the Hard Disk Drive (HDD) heater and the temperature is too cold to safely turn on the HDD.
GoBook II Help Page 57 of 68 You tried to access a drive that does not exist. This can happen if you try to access drive D, but the media is not loaded. Report this error to your supervisor or help desk. Non-System disk or disk error Replace and press any key when ready This can occur if media is in the card socket and you restart the computer. Remove the media, and then press any key.
GoBook II Help Page 58 of 68 If you don’t find a solution for your situation here, try one of the resources listed below. If you are having a problem with a computer application , use the online Help that comes with the application to find a solution. If you still cannot resolve your problem, contact the help desk at your organization. For More Help Windows Help is already installed on your system. To access this information, select Windows Help and Support from the Start Menu.
GoBook II Help Page 59 of 68 GoBook II™ Help Batteries The battery does not charge To prevent possible damage to the battery, the system will not allow a charge if the battery temperature is extremely hot or cold (such as in a closed, unattended vehicle). If possible, charge the battery in a location with a moderate temperature of around 20°C (68°F). If possible, turn off the computer while the battery is charging.
GoBook II Help Page 60 of 68 This may indicate that the charging process terminated prematurely. The gas gauge reads “full,” but the charging indicator light is still blinking If you charge your battery daily, rely on the gas gauge reading to determine battery capacity. The charging process may continue even if the gas gauge reads full. External power can be removed because the battery is virtually full.
GoBook II Help Page 61 of 68 Press FN+INSERT to change from insert mode to overwrite mode to enable a block cursor. When it defaults to insert mode, the DOS editor uses an underline cursor which is less visible than the block cursor for overwrite mode. The display appears to have random pixels darkened after scrolling Contact your supervisor or your organization’s help desk for information about correcting this problem.
GoBook II Help Page 62 of 68 72_0103_003 10 December 2002 © 2002 Itronix Corporation. All rights reserved. GoBook II™ Help I/O Ports I can’t access a serial port Make sure another application is not using the same port . Make sure the correct COM port is selected in your application. Refer to the online Help for your application. 72_0103_003 10 December 2002 © 2002 Itronix Corporation. All rights reserved.
GoBook II Help Page 63 of 68 GoBook II™ Help Landline Modems The modem doesn’t work When you first try to use HyperTerminal or similar application , the system responds with a message asking if you want to install the modem. Answer “Yes” to this question and follow the instructions on the screen to install it. Make sure the communication settings are correct in your application. Refer to the online Help for your application.
GoBook II Help Page 64 of 68 72_0103_003 10 December 2002 © 2002 Itronix Corporation. All rights reserved. GoBook II™ Help Miscellaneous The computer shuts off unexpectedly The computer has entered suspend mode . Press any key to turn it back on. The battery capacity may be low. Connect external power to charge the battery, or replace the battery with a fully charged one. The battery contacts may be dirty. Turn off the computer, remove the battery, and clean the contacts.
GoBook II Help Page 65 of 68 suspend automatically when they are connected to external power. Make sure the standby time is set properly in the Power Management program. The system date and time are incorrect Reset the correct date and time by choosing the Date/Time icon from Control Panel and making the appropriate changes. I receive an “out of memory” error message Too many applications may be running at the same time. Close applications you don’t need.
GoBook II Help Page 66 of 68 GoBook II™ Help Mouse I have difficulty double-clicking the mouse fast enough From the Start Menu, select Settings, Control Panel, and then choose Mouse. The Buttons tab contains the setting for the double-click speed. I can’t see the mouse pointer The mouse pointer may be off the screen. Move the mouse until it reappears on the screen. From the Start Menu, select Settings, Control Panel, and then choose Mouse.
GoBook II Help Page 67 of 68 in the lower right corner), and choose “Stop [card name] card.” The computer locks up when inserting a PC card Because of the combination media bay configuration on the GoBook II, the computer may not be locked up. Instead, it may be taking a couple of minutes before the system recognizes the PC card slot. 72_0103_003 10 December 2002 © 2002 Itronix Corporation. All rights reserved.
GoBook II Help Page 68 of 68 © 2002 Itronix Corporation. All rights reserved. file://C:\Documents%20and%20Settings\harwoodm.ITRXNT1\Local%20Settings\Temp\~...
Legal Information Page 1 of 3 GoBook II™ Help Legal Information Identification GoBook II (IX260) Help December 2002 · Revision 003 Copyright Notice © Copyright 2002 Itronix Corporation. All rights reserved.
Legal Information Page 2 of 3 The GoBook II (IX260) computer complies with Part 68 of the FCC Rules. On the bottom of this equipment is a label that contains, among other information, the FCC registration number and ringer equivalence number (REN) for this equipment. If requested, this information must be provided to the telephone company. The REN is used to determine the quantity of devices which may be connected to the telephone line.
Legal Information Page 3 of 3 device to send any message via a telephone fax machine unless such message clearly contains in a margin at the top or bottom of each transmitted page or on the first page of the transmission, the date and time it is sent and an identification of the business or other entity, or other individual sending the message and the telephone number of the sending machine or such business, other entity, or individual.