
User's Guide
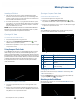
Table Of Contents
- Notices and Safety
- Getting Started
- Getting Familiar
- Making Connections
- Wireless Communication
- Battery Power
- BIOS Setup Utility
- Maintenance and Storage
- Optional Equipment
- Service and Support
- Troubleshooting
- For More Help
- Applications
- Batteries
- Hard Disk
- Landline Modems
- The modem doesn’t work
- The modem doesn’t dial a number
- The modem dials and receives an answer but does not establish a connection
- Communications programs such as HyperTerminal don’t seem to work or they lock Windows®
- The modem dials and the answering modem generates tone, but our modem does not begin the training sequence to establish a connection
- Miscellaneous
- The computer shuts off unexpectedly
- The speaker volume is too high or too low
- The computer won’t turn on
- The computer won’t turn off
- The computer enters suspend mode too quickly
- The computer doesn’t automatically suspend
- The system date and time are incorrect
- I receive an “out of memory” error message
- Holding down the Power button to reset the computer doesn’t always work
- PC Cards
- Pen / Display
- When I try to use the pen on my display, nothing happens
- The display warps or pillows in high humidity
- The touch screen doesn’t respond after a suspend
- I cannot change the orientation
- The display performance is slow
- I can’t read the display
- The underlined, inverse, and hypertext characters are difficult to read on the screen
- I can’t see the cursor while using the DOS editor
- The display appears to have random pixels darkened after scrolling
- I changed my display resolution, but I see no difference on the screen
- The display cuts off the right side of the application or page in portrait mode
- FAQs
- How do I calibrate the pen/display?
- How do I change the main battery?
- How do I adjust the speaker volume?
- How do I clean the display screen?
- How do I change the display screen’s brightness?
- How do I change the display orientation?
- How do I switch between Digitizer and Touch Screen modes?
- How long will the battery last?
- How do I optimize the GD3080 for left handed use?
- Where can I find the user manual?

General Dynamics Itronix | 72-0145-001
GD3080 User Guide
Battery Power
Replacing the Real Time Clock Battery
The Real Time Clock has a replaceable coin battery located
under the battery pack. Only replace with the same coin cell
type as the original.
1. Remove the battery pack.
2. Lift the coin battery out of the holder.
3. Install a new coin battery with the positive terminal up.
4. Re-install the battery pack.
A Field Kit is available - visit the General Dynamics Itronix web-
site for a full list of available kits.
Battery Calibration
The battery calibration process fully charges, discharges, and
recharges the battery. This allows the Windows® battery gas
gauge to accurately monitor battery status.
It is recommended you calibrate your battery:
The first time you use it
After it has been stored for awhile
If the gas gauge has become inaccurate.
For optimum performance, we recommend calibrating the bat-
tery and optional secondary battery every three months
You can calibrate your main battery or optional second exter-
nal battery from the BIOS Setup Utility. You can also calibrate
the main battery from within Windows®.
Windows® Level Battery Calibration
For WindoWs® xP: To run the Battery Calibration program
from Windows®, select Start, Programs, and Mobile Com-
puter Tools .
After starting calibration, the Battery Calibration application
requires no further input from the user. The calibration consists
of four steps:
1. Partial Discharge.
2. Charge: The battery is fully charged to 100 %.
3. Discharge and calibrate: First, the battery is discharged all
the way down to zero. Then the battery is ‘calibrated’ but not
charged. You may stop the process after this point and let the
battery charge outside of the battery calibration application.
4. Charge: If the battery calibration continues running, the battery
will fully charged to 100%.
note The unit will not go into suspend mode while Battery
Calibration is running.
Caution Do not disconnect AC power while Battery Cali-
bration is running. If AC remains disconnected for more than
two minutes, the application will terminate.
Caution Do not remove the battery while Battery Calibra-
tion is running. Doing so will cause the application to terminate
immediately.
BIOS Level Battery Calibration
1. Plug in the AC adapter.
2. Restart the computer and when the startup screen appears,
press the
OK/ENTER hot key. This starts the Setup Utility.
3. Select the Setup function “Battery Calibration”. Press the
LINE UP or LINE DOWN keys to select the option
4. Press the OK/ENTER key to continue.
5. Next, choose which battery you want to calibrate, the primary
battery or optional secondary battery.
6. You will be prompted to make sure the AC adapter and Battery
are present. Do this and then Select
Yes to begin “battery auto-
learning.”
Battery calibration takes from 10 to 16 hours, depending on
how much power the battery already contains. You can speed
up calibration by starting with a fully charged battery.
note External power is required for battery calibration.