
Installation Manual
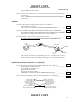
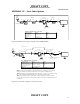
DRAFT COPY
NOMAD MXU Installation Manual
3:36 PM 02/12/99
DRAFT COPY
22
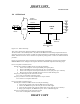
c. Power on the NOMAD MXU.
d. If the Ready LED comes on within 3 to 5 minutes mark the Coax cable and MXU connector as
good. Else mark both “questionable”.
e. Repeat steps a,b,c & d for each of the three remaining channels.
Second Step: We need to determine which “Questionable” cables are bad.
a. Power Down the MXU
b. Disconnect all the antenna cables from the back of the MXU.
c. Connect the questionable coax from a bad channel to a good MXU channel.
d. Power on the NOMAD MXU.
e. If the Ready LED comes on within 3 to 5 minutes mark the questionable Coax cable good. Else
mark the cable bad.
f. Repeat steps a,b,c d & e for each of the three remaining “questionable” cables.
TO REPAIR ANTENNA/ COAX CABLES, REFER TO Section 6.3.
Third Step: We need to determine which “Questionable” MXU RF channels are bad.
a. Power Down the MXU
b. Disconnect all the antenna cables from the back of the MXU.
c. Connect a “good” coax to a “questionable MXU channel.
d. Power on the NOMAD MXU.
e. If the Ready LED comes on within 3 to 5 minutes mark the questionable MXU Channel “good”.
Else mark the RF Channel “bad”.
f. Repeat steps a,b,c d & e for any remaining “questionable” MXU RF channels.
NOTIFY THE GATEWAY OF ANY BAD MXU RF CHANNELS.
5.5 Request Initialization
When all the initial checks are OK, call gateway and request initialization