
User's Manual
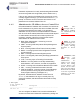
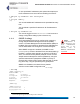

Table Of Contents
- Chapter 1 Introduction
- Chapter 2 Mesh Point CLI and Administrative Access
- Chapter 3 Networking and Radio Configuration
- 3.1 Network Interfaces
- 3.2 Network Bridging
- 3.2.1 Bridging Configuration
- 3.2.2 FastPath Mesh Bridging
- 3.2.3 Fine-tuning FastPath Mesh Network Performance
- 3.2.3.1 Selecting the FastPath Mesh Multicast Transmit Mode
- 3.2.3.2 Setting the FastPath Mesh Packet Interval
- 3.2.3.3 Setting the FastPath Mesh Transmit Control Level
- 3.2.3.4 Setting Multicast Video Clamping Thresholds
- 3.2.3.5 Setting Mesh Routing Reactivity
- 3.2.3.6 Setting Mesh Packet Time To Live
- 3.2.3.7 Viewing Current Mesh Performance Parameters
- 3.2.3.8 Frame Processor Parameters
- 3.2.4 STP Bridging
- 3.3 Global Radio Settings
- 3.4 Individual Radio Settings
- 3.4.1 Radio Band, Short Preamble, Guard Interval
- 3.4.2 Channel Selection
- 3.4.3 Distance, Beacon Interval, Noise Immunity
- 3.4.4 Network Type, Antenna Gain, Tx Power
- 3.4.5 MIMO
- 3.4.6 STBC
- 3.4.7 Channel Lock and Other Channel Selection Features
- 3.4.8 DFS, TDWR, and Channel Exclusion
- 3.4.9 Radio BSS Settings
- 3.4.9.1 BSS Radio, BSS Name and SSID
- 3.4.9.2 WDS Bridging or AP Infrastructure Configuration
- 3.4.9.3 BSS State, SSID Advertising and Drop Probe Requests
- 3.4.9.4 BSS STA Idle Timeout and 802.11g-Only Settings
- 3.4.9.5 BSS Unicast Transmission Rate Settings
- 3.4.9.6 BSS WMM QoS Setting
- 3.4.9.7 BSS Fragmentation and RTS Thresholds
- 3.4.9.8 BSS DTIM Beacon Countdown
- 3.4.9.9 BSS VLANs Settings
- 3.4.9.10 BSS Fortress Security Zone
- 3.4.9.11 FastPath Mesh BSS Cost Offset
- 3.4.9.12 BSS Multicast Settings
- 3.4.9.13 Bridging MTU and Beacon Encryption
- 3.4.9.14 BSS Description
- 3.4.9.15 BSS Wi-Fi Security Configuration
- 3.4.10 Antenna Tracking / Rate Monitoring
- 3.4.11 ES210 Mesh Point STA Settings and Operation
- 3.4.11.1 STA Radio, Name, SSID and SSID Roaming
- 3.4.11.2 STA State
- 3.4.11.3 STA Unicast Transmission Rate Settings
- 3.4.11.4 STA Background Scanning
- 3.4.11.5 STA WMM QoS Setting
- 3.4.11.6 STA Fragmentation and RTS Thresholds
- 3.4.11.7 STA Multicast Rate
- 3.4.11.8 STA Description
- 3.4.11.9 STA Wi-Fi Security Configuration
- 3.4.11.10 Editing or Deleting a STA Interface Connection
- 3.4.11.11 Establishing a STA Interface Connection
- 3.4.11.12 ES210 Station Access Control Lists
- 3.5 Local Area Network Configuration
- 3.6 Time and Location Configuration
- 3.7 GPS and Location Configuration
- 3.8 DHCP and DNS Services
- 3.9 Ethernet Interfaces
- 3.10 Quality of Service
- 3.11 VLANs Implementation
- 3.12 ES210 Mesh Point Serial Port Settings
- 3.13 Mesh Viewer Protocol Settings
- Chapter 4 Network Security, Authentication and Auditing
- 4.1 Fortress Security Settings
- 4.1.1 Operating Mode
- 4.1.2 FIPS Settings
- 4.1.3 MSP Encryption Algorithm
- 4.1.4 Encrypted Data Compression
- 4.1.5 MSP Key Establishment
- 4.1.6 MSP Re-Key Interval
- 4.1.7 Key Beacon Interval
- 4.1.8 Fortress Legacy Devices
- 4.1.9 Encrypted Zone Cleartext Traffic
- 4.1.10 Encrypted Zone Management Settings
- 4.1.11 Authorized Wireless Client Management Settings
- 4.1.12 Turning Mesh Point GUI Access Off and On
- 4.1.13 SSH Access to the Mesh Point CLI
- 4.1.14 Blackout Mode
- 4.1.15 Allow Cached Credentials
- 4.1.16 Fortress Access ID
- 4.2 Digital Certificates
- 4.3 Access Control Entries
- 4.4 Internet Protocol Security
- 4.5 Authentication and Timeouts
- 4.5.1 Authentication Servers
- 4.5.2 Internal Authentication Server
- 4.5.2.1 Basic Internal Authentication Server Settings
- 4.5.2.2 Certificate Authority Settings
- 4.5.2.3 Global User and Device Authentication Settings
- 4.5.2.4 Local 802.1X Authentication Settings
- 4.5.2.5 OCSP Authentication Server Settings
- 4.5.2.6 OCSP Cache Settings and Management
- 4.5.2.7 Internal Authentication Server Access Control Lists
- 4.5.3 User Authentication
- 4.5.4 Client Device Authentication
- 4.5.5 Session Idle Timeouts
- 4.6 ACLs and Cleartext Devices
- 4.7 Remote Audit Logging
- 4.8 Wireless Schedules
- 4.1 Fortress Security Settings
- Chapter 5 System Options, Maintenance and Licensing
- Chapter 6 System and Network Monitoring
- Index
- Glossary

Fortress ES-Series CLI Guide: Mesh Point CLI and Administrative Access
18
NOTE:
Except for
-uiInactivity
Timeout
changes, which
take effect immediately,
changes to global
administrator settings
are applied at the next
administrator logon.
The Mesh Point CLI displays the configurable fields for set
account one at a time. Enter a new value for the field—or
leave the field blank and the setting unchanged—and strike
Enter↵, to display the next field.
Alternatively, you can execute
set
account
non-interactively
with valid switches and arguments in any order and
combination:
#
set account -historyDepth 0-10 -minCapitalLetters 0-5 -minLowerCaseLetters 0-5
-minNumbers 0-5 -minPunctuation 0-5 -minDifference 0-5 -minPasswordLength 8-32
-passwordExpires Y|N -passwordExpiration 1-365 -passwordExpirationWarning 0-365
-forceNonConfExpire Y|N -showLastLogin enable|disable -uiInactivityTimeout 0|1-60
-failedAttemptTimeout 0|1-60 -usedictionary enable|disable -allowconsecutivecharacters
enable|disable -maxtry 1-9 -lockoutperm Y|N -lockouttime 0-60 -authMethod local|radius
-accountAuthFailback enable|disable
NOTE: The pass-
word complexity
requirements estab-
lished with set
account apply equally
to administrative and
local user account pass-
words (Section 4.5.3).
The Mesh Point CLI returns [OK] when settings are
successfully changed.
You must be logged on to an
administrator
-level account to
change administrative settings (refer to Section 2.2).
2.2.2 Administrator Logon Banner
You can configure a logon banner of up to 2000 characters for
display when administrators log on to the Mesh Point.
View the currently configured
WelcomeMessage with show
banner
:
> show banner
If no logon banner is configured, show banner returns no text.
No welcome message is configured by default. Enter a single-
line message for display on administrator logon screens with
set banner.
# set banner -welcome
<“banner string”>
You can configure a longer banner that spans multiple lines
using the command
set banner -multi.
# set banner -multi
Enter multiline text (maximum 2000 chars) and press Ctrl-C to exit
When a banner is configured, administrators must accept its
terms in order to log on.
You must be logged on to an
administrator
-level account to
change configuration settings (refer to Section 2.2).