
User's Manual
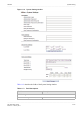
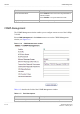

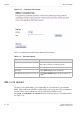

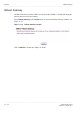
Table Of Contents
- About this document
- Contents
- 1 Product overview
- 2 Hardware installation
- 3 TCP/IP configuration
- 4 Accessing the CellPipe 7130 RG web configuration tool
- 5 Status
- 6 Network
- 7 WiFi Setup
- 8 Firewall Setup
- 9 Advanced Setup
- 10 QoS PTM Setup
- 11 Utilities
- 12 Telephony
- 13 USB Service
- 14 FCC and IC Statement
- A Troubleshooting
- B Product conformance
- Glossary

Restore Factory DefaultsUtilities
............................................................................................................................................................................................................................................................
3EQ-10422-AAAA-TCZZA
Edition 01 February 2011
11-11
............................................................................................................................................................................................................................................................
Figure 11-8 802.1x CA Upload window
Table 11-7 describes the fields of the 802.1x CA Upload window.
Table 11-7 Field descriptions
Restore Factory Defaults
The Restore Factory Defaults window enables you to restore the default settings to the
CellPipe 7130 RG.
Select Restore Factory Defaults in the Utilities menu to access the Restore Factory
Defaults window; see Figure 11-9.
Figure 11-9 Restore Factory Defaults window
Click on Restore Defaults to restore the CellPipe 7130 RG to the factory default settings.
Field Description
File Click Browse to select a CA certificate on your
computer to upload.
Upload Upload the selected CA certificate.
Index Index number of CA certificate. (Maximum of 8 CA
certificates are supported.)
Information Information of the CA certificate.