
User Manual Part 2


User’s Guide Version 1.0
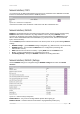
1. username follow the format: username@WISPdomain
2. username follow the format: WISPdomain/username
3. use prefix of username as wisp name, the range of prefix length is from 2 to 6.
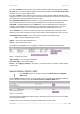
Figure 115 – Domain Policy
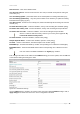
New – click to define WISP for RADIUS server.
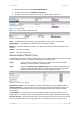
Figure 116 – Define New WISP
Name – new WISP domain name [string, up to 256 symbols, no space, dot or dash allowed].
RADIUS Name – select RADIUS for new WISP from list box [non editable].
Bound To – select the WISP binder interface. The WISP can be associated with appropriate device
interface.
Update – system with new WISP.
Cancel – restore all previous values.
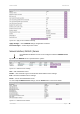
Network Interface | RADIUS | Proxy
The BW1330 can forward the RADIUS authentication and accounting requests from Access Point (AP)
to the real RADIUS server. To configure the RADIUS proxy, follow the steps:
Step 1 Connect the Access Point to any LAN port available on the Access Controller
(BW1330). The AP should be in the bridge mode.
Step 2 Using the network interface | RADIUS | proxy menu configure the RADIUS proxy
parameters: RADIUS authentication port (UDP), RADIUS accounting port (UDP) -
different from authentication port and Accounting detection timeout:
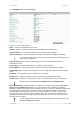
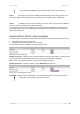
Figure 117 – RADIUS Proxy Settings
RADIUS Proxy Status – select [enabled] to enable the RADIUS proxy feature [enabled/disabled].
Authentication Port – specify the port on AC for listening the RADIUS authentication packets. The
AC RADIUS proxy authentication port will accept only RADIUS authentication packets [1-65535,
default: 1812].
Accounting Port – specify the port on AC for listening the RADIUS accounting packets. The AC
RADIUS proxy accounting port will accept only RADIUS accounting packets [1-65535, default: 1813].
Detection Timeout – specify the RADIUS proxy accounting detection timeout in seconds. The AC will
wait the specified period for accounting packet after the authentication request was got [0-3600].
BROWAN Page
75