
User Manual Part 1
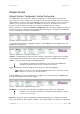


User’s Guide Version 1.0
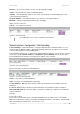
Clients using an IP address from the management subnet can browse the Internet without
authorization, and no accounting will be done. Thus, it is strongly recommended to allow traffic only
from the administrative remote network (no 0.0.0.0/0.0.0.0 in remote specification).
Example:
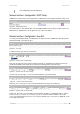
Interface configuration for ixp0:
type: LAN
IP address: 192.168.3.1
netmask: 255.255.255.0
gateway: ixp1
Management subnet on ixp0:
IP address: 10.0.0.1
netmask: 255.255.255.0
remote network: 10.10.0.1
remote netmask: 255.255.255.0
With these settings applied, the administrator will be able to connect to devices behind the BW1330
on interface ixp0, if these devices use address in the range: 10.0.0.2 ... 10.0.0.254. The administrator
is connecting via the Internet (from ixp1 interface).
The administrator’s computer can have an address from 10.10.0.1 to 10.10.0.254.
Please note that devices which are using 10.0.0.2. – 10.0.0.254 addresses have
access to the administrative network too!
In this example, the administrative network uses the reserved IP address (10.x.x.x) – they are not
routed in the Internet, so the administrator should setup routers in a path between the BW1330 and
the administrator's computer to recognize 10.x.x.x addresses and route them correctly. This is not
comfortable and sometimes it is impossible. There is a solution – the administrator can use GRE
tunnel(see:
Network Interface | Tunnels) to setup a tunnel between the administrator's computer
and the BW1330. The only addresses visible on the Internet will be the BW1330 WAN IP address and
the administrator's computer (or router) IP address.
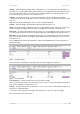
Network Interface | DNS
DNS (Domain Name Service) service allows AC subscribers to enter URLs instead of IP addresses
into their browser to reach the desired web site.
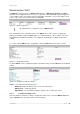
Figure 98 –- DNS Settings Configuration
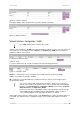
You can enter the primary and secondary DNS servers settings under the network interface | DNS
menu.
Figure 99–Edit DNS Redirection Settings
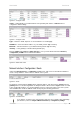
The DNS server or DNS address can be obtained dynamically if DHCP, PPPoE (for DSL) service is
enabled. To add DNS server manually click the edit button in the action column and type in the DNS
server’s IP address:
IP address – enter the primary or secondary DNS server’s IP address [in digits and dots notation].
Save – click to save the new DNS server’s settings.
BROWAN Page
67