
Technical Specifications


4 | GE Oil & Gas © 2014 General Electric Company. All rights reserved.
CAUTION
CAUTION
WARNING
DANGER
Do not tighten nuts to final torque specifications at
this time. The bonnet is used temporarily for guiding
purposes only.
7. lnsert two or three pieces of packing (6) into the packing
box to assist in guiding the stem and plug during lapping.
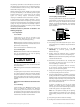
8. Screw a drilled and tapped rod with a T-handle onto the
plug stem and secure with a locknut (see Figure 4).
Note: As an alternative, drill a hole through a flat steel
plate and fasten to the plug stem using two locknuts.
9. Apply slight pressure on the stem, and rotate the stem
in short oscillating strokes (around 8 to 10 times).
Repeat this step as necessary.
Note: The plug should be lifted and turned 90° each
time before repeating Step (9). This intermittent lifting is
required to keep the plug and seat ring concentric during
lapping.
CAUTION
CAUTION
WARNING
DANGER
Avoid over-lapping as this can cause damage to
the seating surface rather than improve leakage
performance.
10.After completion of the lapping operation, remove bonnet
and plug. The seating area of the seat ring and the plug
must be cleaned of all lapping compound in preparation
for reassembly. Do not remove seat ring.
7.3.2 Quick-Change Trim (Figure 13 or 15)
1. CIean body gasket surface areas.
2. Install a new seat ring gasket (15) and insert seat ring
(14) in the body.
Note: Gasket (15) is temporarily placed to hold the seat
ring during lapping.
It is imperative to use a new gasket or a test part
having the same geometrical characteristics in
order to ensure the correct position of the seat ring
during lapping.
This gasket (or similar part) can be kept after lapping
for future use.
The gasket used for lapping must not be reused for
the body reassembly.
3. Apply lapping compound at several spots equally
spaced around the seating area of the seat ring.
4. Insert the cage (13) into the body.
5. lnsert the stem and plug sub-assembly carefully into
the body until it is seated.
6. PIace bonnet (8) on the body.
CAUTION
CAUTION
WARNING
DANGER
Ensure that the seat ring (14), cage (13) and bonnet (8)
are properly aligned.
bonnet. These will be furnished upon request.
7.3 Lapping Seats
Lapping is the process of working the valve plug against
the seat ring with an abrasive to produce a close fit. If
valve leakage is excessive, lapping becomes necessary. The
plug and seat ring seating surfaces should be free of large
scratches or other defects, and the contact surfaces of the
seats should be as narrow as possible. This may require
dressing both parts in a lathe. The seating surface angle of the
plug is 28 degrees and the seat ring is 30 degrees (relative to
the centerline axis). A good grade of fine grinding compound
is required for the lapping operation.
The compound should be mixed with a small quantity of
lubricant such as graphite. This will slow the cutting rate
and prevent tearing of the seating surfaces. The amount
of lapping required depends on the materials, condition of
seating surfaces, and accuracy of machining. lf a short period
of lapping does not visibly improve seating, there is usually no
advantage in continuing as excessive lapping may result in
rough seats. The only remedy is replacement or re-machining
of one or both parts. When lapping new plugs and seat rings,
begin with a medium fine (240 grit) and finish with a finer
grade (600 grit).
Note: Lapping should produce a line contact area, not the
entire surface, due to the difference in seat angles.
CAUTION
CAUTION
WARNING
DANGER
Before lapping, the plug and stem sub-assembly must be
concentric. (See pinning operation, section 7.5).
7.3.1 Threaded Trim (Figure 12 or 14)
1. CIean body gasket surface areas.
2. When seat has been removed, ensure that the sealing
surface in the body bridge and the threads are
thoroughly cleaned.
Note: A sealant compatible with the process should be
applied sparingly to the seat ring threads and sealing
shoulder.
3. lnstall and tighten seat ring using fabricated wrench
used for removal.
CAUTION
CAUTION
WARNING
DANGER
Do not over-tighten. Do not strike seat ring lugs
directly. This could distort the seat ring resulting in seat
leakage.
4. Apply lapping compound on the plug at several spots
equally spaced around the seating area.
5. lnsert the stem and plug sub-assembly carefully into
the body until it is seated.
6. Place bonnet (8) on the body and fasten the bonnet to the
body using four body stud nuts (10) spaced equally apart.
Apply slight pressure and tighten evenly.