
Technical Specifications
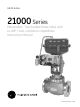


Masoneilan 21000 Series Top Guided Globe Valve | 3
© 2014 General Electric Company. All rights reserved.
6.2 Quick-Change Trim (Figure 13 or 15)
After removing the actuator, disassemble the body using the
following procedure:
A. If there is a leak detection connection on the lateral NPT
port of the bonnet, disconnect this piping as well.
B. Remove body stud nuts (10).
C. Remove bonnet (8), and plug stem (1) and plug (16) sub-
assembly together as one unit.
D. Since the cage (13), seat ring (14) and seat ring gasket (15) are
held in place by the bonnet, they may now be removed.
Note: Spiral wound gaskets (11 & 15) are standard in the
21000 Series design and it is imperative that new gaskets be
installed each time the valve is disassembled.
E. Remove packing flange stud nuts (3), packing flange (4)
and packing follower (5).
F. Remove plug (16) and plug stem (1) sub-assembly from
the bonnet (8).
CAUTION
CAUTION
WARNING
DANGER
Care must be taken to avoid damage to the plug and plug
guide.
G. Remove old packing (6) [and optional lantern ring (7) if a
leak detection connection has been installed]. Refer to
Figure 5.
H. All components may now be inspected for wear and service
damage. After determining the maintenance required,
proceed to the appropriate Section of this instruction
manual.
7. Maintenance & Repair
The purpose of this section is to provide recommended
maintenance and repair procedures. These procedures assume
the availability of standard shop tools and equipment.
7.1 Threaded Seat Ring Removal (Figure 12 or 14)
Threaded seat rings (14) are installed tightly by the
manufacturer, and after years of service they may be difficult
to remove.
To facilitate removal, seat ring wrenches can be fabricated
to engage the seat ring lugs and adapted to a standard
wrench. If the seat ring is exceptionally resistant to removal,
the application of heat or penetrating oil should be helpful.
CAUTION
CAUTION
WARNING
DANGER
When using heating devices, ensure that proper safety
practices are observed. Flammability and toxicity of the
process fluid must be considered and proper precautions
taken.
7.2 Bushing Removal
The bushing (12) is press fit into the bonnet and does not
normally require replacement. If necessary, it may be pulled
or machined out. When machining the bushing out, care must
be taken to maintain proper dimensions and tolerances in the
4.4 For heat-insulated installation, do not insulate the valve
bonnet. Take necessary protective measures relate to
personal safety.
5. Air Piping
The actuators are designed to accept
1
/4" NPT air supply piping.
Use
1
/4" OD tubing (4 x 6 mm) or equivalent for all air lines. If the
supply air line exceeds 25 feet in length (7 meters) or if the valve
is equipped with volume boosters, then
3
/8" tubing (6 x 8 mm) is
preferred. AII connections must be free of leaks.
CAUTION
CAUTION
WARNING
DANGER
Do not exceed supply pressure indicated on serial plate located on
the yoke of the actuator.
6. Body Disassembly
Access to the internal components of the body should be
accomplished with the actuator removed. To remove the
actuator from the body, refer to the actuator instruction Ref.
GEA19530 for a type 87/88 multispring actuator.
CAUTION
CAUTION
WARNING
DANGER
Prior to performing maintenance on the valve, isolate the valve
and vent the process pressure. Shut off the supply air line and the
pneumatic or electric signal line.
6.1 Threaded Trim (Figure 12 or 14)
After removing the actuator, disassemble the body using the
following procedure :
A. If there is a leak detector connection on the lateral NPT
port of the bonnet, disconnect this piping as well.
B. Remove body stud nuts (10).
C. Remove bonnet (8), and plug stem (1) and plug (16) sub-
assembly together as one unit.
Note: Spiral wound body gaskets (11) are standard in the
21000 Series design and it is imperative that a new gasket
be installed each time the valve is disassembled.
D. Remove packing flange stud nuts (3), packing flange (4)
and packing follower (5).
E. Remove plug (16) and plug stem (1) sub-assembly from the
bonnet (8).
CAUTION
CAUTION
WARNING
DANGER
Care must be taken to avoid damage to the plug and plug
guide.
F. Remove old packing (6) [and optional lantern ring (7) if a
leak detection connection has been installed]. Refer to
Figure 5.
G. Bonnet (8), plug (16), bushing (12) and seat ring (14) may
now be inspected for wear and service damage. After
determining the maintenance required, proceed to the
appropriate Section of this instruction manual.