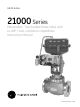
GE Oil & Gas 21000 Series Masoneilan* Top Guided Globe Valve with Lo-dB* / Anti-cavitation capabilities Instruction Manual GE Data Classification : Public
THESE INSTRUCTIONS PROVIDE THE CUSTOMER/OPERATOR WITH IMPORTANT PROJECT-SPECIFIC REFERENCE INFORMATION IN ADDITION TO THE CUSTOMER/OPERATOR’S NORMAL OPERATION AND MAINTENANCE PROCEDURES. SINCE OPERATION AND MAINTENANCE PHILOSOPHIES VARY, GE (GENERAL ELECTRIC COMPANY AND ITS SUBSIDIARIES AND AFFILIATES) DOES NOT ATTEMPT TO DICTATE SPECIFIC PROCEDURES, BUT TO PROVIDE BASIC LIMITATIONS AND REQUIREMENTS CREATED BY THE TYPE OF EQUIPMENT PROVIDED.
Table of Contents Page Important: Safety Warning........................................................... .................................................1 1. INTRODUCTION................................................................................................................................... 2 2. GENERAL 2 3. UNPACKING.......................................................................................................................................... 2 4. INSTALLATION...................
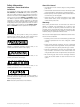
Safety Information Important - Please Read Before Installation The 21000 Series Control Valves instructions contain DANGER, WARNING, and CAUTION labels, where necessary, to alert you to safety related or other important information. Read the instructions carefully before installing and maintaining your control valve. DANGER and WARNING hazards are related to personal injury. CAUTION hazards involve equipment or property damage.
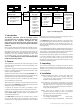
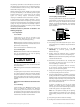
1st 2nd Actuator Type 87 88 Spring Diaphragm Air to Close Spring Diaphragm Air to Open 1st Body Series 21 Plug Type 0. Undefined 1. Contoured 6. Soft Seat 7. Single Stage Lo-dB/ Cavitation Containment 8. Double Stage Cavitation Containment 9. Double Stage Lo-dB 1. lntroduction The following instructions should be thoroughly reviewed and understood prior to installing, operating or performing maintenance on this equipment.
4.4 For heat-insulated installation, do not insulate the valve bonnet. Take necessary protective measures relate to personal safety. 6.2 Quick-Change Trim (Figure 13 or 15) After removing the actuator, disassemble the body using the following procedure: 5. Air Piping A. If there is a leak detection connection on the lateral NPT port of the bonnet, disconnect this piping as well. WARNING The actuators are designed to accept 1/4" NPT air supply piping.
bonnet. These will be furnished upon request. 7.3 Lapping Seats Lapping is the process of working the valve plug against the seat ring with an abrasive to produce a close fit. If valve leakage is excessive, lapping becomes necessary. The plug and seat ring seating surfaces should be free of large scratches or other defects, and the contact surfaces of the seats should be as narrow as possible. This may require dressing both parts in a lathe.
WARNING 7. Fasten the bonnet to the body using four body stud nuts (10) spaced equally apart. Apply slight pressure and tighten evenly. CAUTION Do not tighten nuts to final torque specifications at this time. The bonnet is used temporarily for guiding purposes only. • Hold the plug (with vise jaw assembly) in a vise. • Lock two nuts against each other on the end of the new plug stem, and screw the stem solidly into the plug using a wrench on the upper nut.
WARNING Using a wrench on the lower nut, unscrew the stem from the plug. The stem is removed by turning it counter-clockwise. connection, refer to Figure 10 for correct amount of rings to place under the lantern ring (7). B. Screwing Stem to Plug E. Replace packing follower (5) and packing flange (4). Refer to step B of the previous section on “REPLACING PLUG AND STEM”. F. Replace and tighten packing stud nuts (3). C.
The packing is provided as a set of five pieces. It consists of two adapter rings and three V-rings. An alternating pattern of Perfluoroelastomer (PFE) and long carbon fiber filled Teflon (PTFE) V-rings are used. Applied properly, this packing exhibits very little cold flow (or creep). Consequently, it can effectively prevent fugitive emissions leaks from a control valve. The LE Packing system can directly replace conventional packing, requiring no modification to the control valve or actuator.
cycled approximately 500 times. Adjust if necessary. No further adjustment should be required for the life of the packing. WARNING WARNING F. Carefully place the plug sub‑assembly into a soft jaw vise, holding the plug by the flats provided on the upper end of the shank. 7.7 Soft Seat Plug (Figure 3) The soft seat plug used in the 21000 Series valve has a replaceable insert. To remove and replace the insert, proceed as follows. CAUTION The shank OD is the plug guide.
WARNING I. Install packing flange stud nuts (3). CAUTION Tighten nuts (10) until metal to metal contact is obtained with proper bolt torque. Refer to Figure 11 for proper bolt torque and tightening sequence specifications. CAUTION WARNING G. lnsert packing (6) [and lantern ring (7) on valve equipped with an optional lubricator connection]. Refer to Section 7.6 for proper packing assembly procedure for standard or optional designs. CAUTION K.
T-Handle Lock Nut Figure 5 - Lubricator Connection (Optional) Figure 4 - Seat Lapping Device Braided Back-up Rings Figure 7 LE® (Low Emission) Packing Arrangement (Optional) Flexible Graphite Rings Figure 6 - Flexible Graphite Rings Arrangement (Optional) Figure 8 Lo-dB (Type 21900) and Anti-cavitation (Type 21800) Double Stage Trim (Optional) 10 | GE Oil & Gas © 2014 General Electric Company. All rights reserved.
D X X B Cylindrical machining diameter of the jaws = plug guide diameter “A” C Dia. A Reference Mark = Plug Guide Plug Stem Dia. “A” Dia. “B” = Pin Hole Dia. “C” “D” “X” in. mm .87 22.22 in. mm in. mm 1/2 12.70 .138 3.50 in. mm in. mm 1.25 32 .50 13 1.50 38.10 1/2 12.70 .138 3.50 1.25 32 .50 13 2.38 60.32 3/4 19.05 .197 5.00 1.88 47.5 .75 19 2.75 69.85 3/4 19.05 .197 5.00 1.88 47.5 .
Assembly Torque Requirements Valve Size inch mm 20 & 25 .75 & 1 1.5 & 2 40 & 50 1.5 40 2 50 3 80 4 100 6 150 8 200 Notes: Torque Requirements Bolting Requirements ANSI Class Qty. Minimum Maximum Pre-Load Size (inch) Lbs.Ft N.m Lbs.Ft N.m Lbs.Ft N.
Figure 12 Threaded Seat Ring - Contoured Plug - Full Capacity Figure 13 Quick Change Trim - Contoured Plug - Full Capacity Figure 14 Threaded Seat Ring - Lo-dB Plug Figure 15 Quick Change Trim - Lo-dB Plug PARTS REFERENCE Ref. l l Part Name Ref. 1 Plug Stem 2 Packing Flange Stud 3 Packing Flange Stud Nut 4 Packing Flange 5 Packing Follower 6 Packing 7 Lantern Ring (optional) 8 Bonnet l Recommended spare parts Part Name Ref.
WARNING Figure 16 - 21000 Series 3/4" to 2" Valve Sizes ANSI Class 900 to 2500 Figure 17 - Angle Body Design 3/4" to 6" Valve Sizes ANSI Class 150 to 600 3/4" to 2" Valve Sizes ANSI Class 900 to 2500 10.1 Bellows Valve Disassembly (Figure 19) Note: Spiral wound gaskets are standard in the 21000 BS Series design. IT IS RECOMMENDED THAT NEW GASKETS ARE INSTALLED EACH TIME THE VALVE IS DISASSEMBLED. 10.1.
• Replacing existing plug and stem-bellows S/A • Replacing stem-bellows S/A only If the plug needs replacing, the stem-bellows subassembly should be replaced at the same time. The original pin hole in a stem which is being reused sometimes prevents a satisfactory result being obtained and can also weaken the plug-stem assembly.
Plug Guide Plug Stem Dia. “E” Dia. “F” in. 7/8 Pin Hole Dia. “C” mm in. mm in. 22.22 1/2 12.70 .138 “D” mm in. mm in. mm 3.50 1.65 42 .70 18 1 1/2 38.10 1/2 12.70 .138 3.50 2.17 55 1.25 32 2 3/8 60.32 3/4 19.05 .197 5.00 2.75 70 2.00 50 2 3/4 69.85 3/4 19.05 .197 5.00 2.75 70 2.
22 2 3 4 19 5 6 25 31 a a 28 28 Section a 27 26 (✚) 30 (✚) 29 DETAIL OF THE PLUG STEM ANTI-ROTATION DEVICE 9 10 17 11 18 12 13 14 16 15 Threaded Trim detail Quick Change Trim Figure 19 — 21000 BS Valve PARTS REFERENCE Ref. Part Name Ref. l 1 Plug Stem 2 Packing Flange Stud.
DIRECT SALES OFFICE LOCATIONS AUSTRALIA Brisbane: Phone: +61-7-3001-4319 Fax: +61-7-3001-4399 Perth: Phone: +61-8-6595-7018 Fax: +61 8 6595-7299 Melbourne: Phone: +61-3-8807-6002 Fax : +61-3-8807-6577 BELGIUM Phone: +32-2-344-0970 Fax: +32-2-344-1123 BRAZIL Phone: +55-11-2146-3600 Fax: +55-11-2146-3610 CHINA Phone: +86-10-8486-4515 Fax: +86-10-8486-5305 FRANCE Courbevoie Phone: +33-1-4904-9000 Fax: +33-1-4904-9010 GERMANY Ratingen Phone: +49-2102-108-0 Fax: +49-2102-108-111 INDIA Mumbai Phone: +91-22-835479