
User Manual
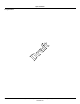
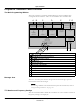

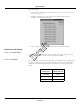

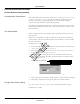
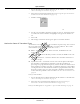
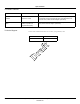
Table Of Contents
- Contents
- 1 Introduction
- 2 Apex Transmitter
- 3 ApexPro CH Transmitter
- Program the Transmitter’s Basic Functions
- View Transmitter Diagnostics
- Update Transmitter Firmware
- ApexPro CH Appendices
- 4 ApexPro Transmitter

24 APEX, ApexPro, and ApexPro CH Transmitter Programming Instructions Revision A - Draft 7
2001989-135
Apex Transmitter
To change the settings:
1. Select the Set TTX button, reference B in “Program Apex Transmitter
Window” on page 23.
2. Another window appears.
3. This window allows you to:
a – Change the TTX Number: Either use the up- and down-arrows to
scroll to the desired TTX number or highlight and type in the number
to use. The frequency changes automatically as you change the TTX
Number.
b – View the associated Frequency in MHz.
NOTE
NOTENOTE
NOTE
Select a frequency that is within the frequency range allowed by your
location. Operating outside of the allowed frequency range may cause
interference problems or data dropout.
Some frequencies are reserved. If the TTX number you choose has a
reserved frequency, this will be indicated as RESERVED in the
frequency display. See the ApexPro Telemetry Transmitter Service
Manual for a list of TTX numbers, associated frequencies and
reserved frequencies.
4. Select OK to save your changes or Cancel to revert to the original
settings.
5. Update the “TTX Frequency Chart” in the ApexPro Telemetry
Transmitter Service Manual to identify changes to the TTX numbers and
the frequencies.
6. Remove the existing label located on the back of the transmitter, select
the appropriate TTX label from the label sheet and apply it to the
transmitter.
Band Setting
The band setting determines the range of frequencies within which the
transmitter is to operate. The band for each transmitter is identified by a
label found in the battery compartment.
a b
715A
Draft