
User Manual Part 7
7-30 ApexPro™ 2001989-301A- draft 1
Viewing real-time patient data
1. Place the K-sound microphone in the microphone pad (or blood pressure cuff).
For more information on microphone placement, refer to Microphone placement
on page 7-30.
2. Locate the patient’s brachial artery on the inside of the arm, just above the elbow.
Mark the location with a pen for easy microphone placement.
3. Remove the backing from the microphone pad and adhere it in the location
marked on the patient’s arm. Do not bend or squeeze the microphone. Route the
microphone cable up, toward the patient’s shoulder.
4. Wrap the blood pressure cuff around the arm. Be sure that the artery marker is
aligned over the brachial artery.
5. Drape the cuff hose over the patient’s shoulder and attach an adhesive cuff
anchor to the snap on the cuff hose. Do not adhere the cuff anchor to the patient
at this time.
6. Place the blood pressure monitor in its pouch and attach it to the patient using the
belt or shoulder strap provided.
7. Adhere the cuff anchor to the patient’s upper arm by removing the adhesive
backing and pressing firmly.
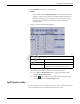
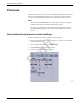
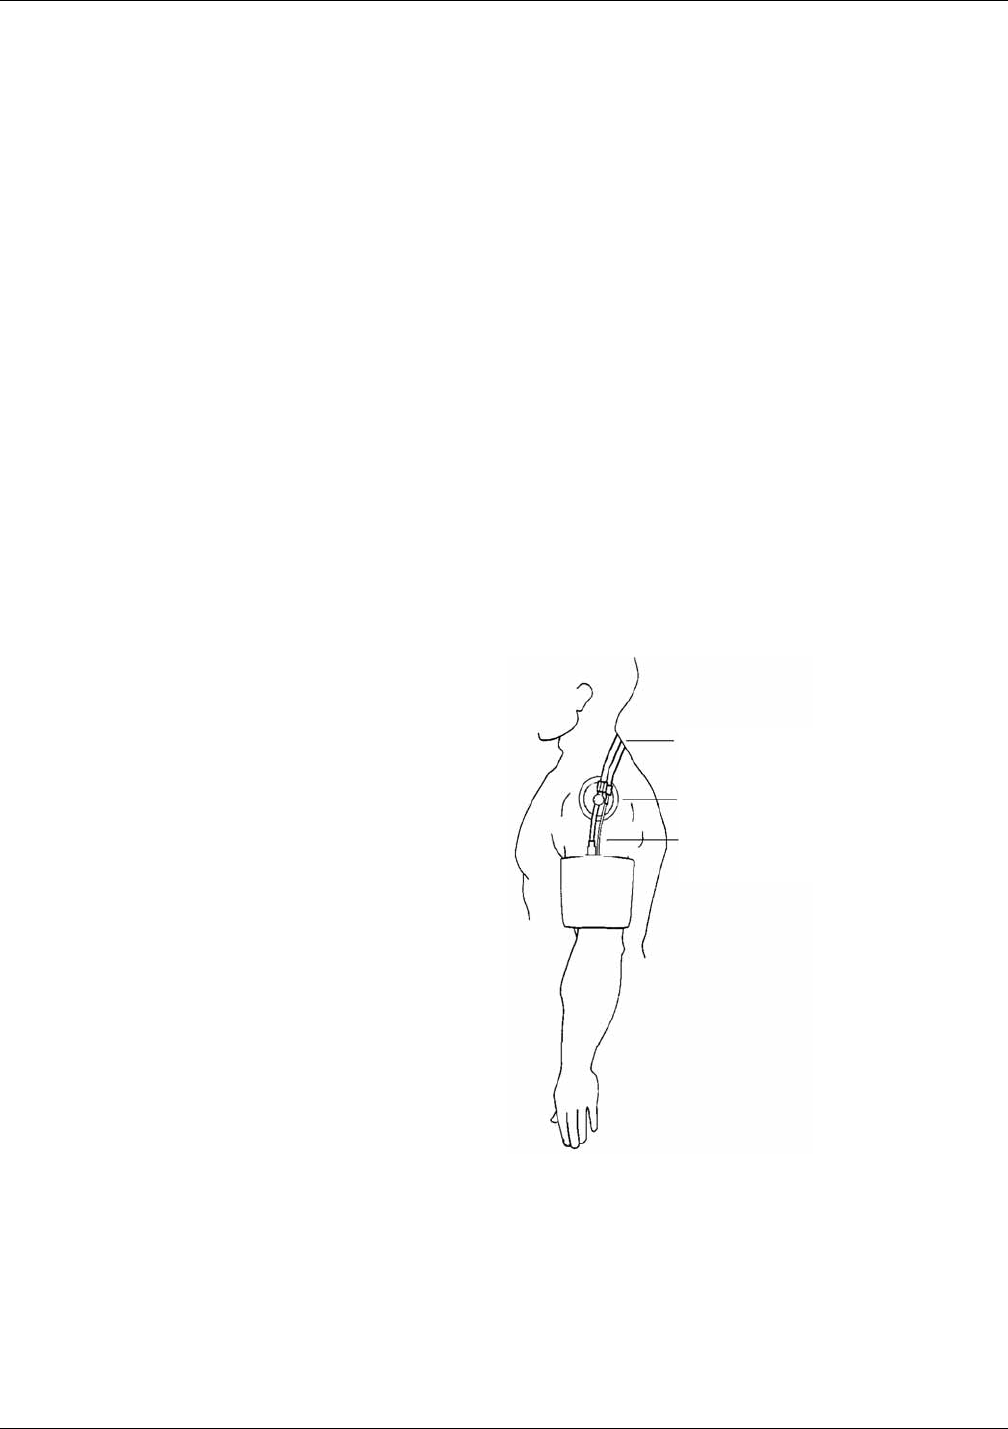
When attached, the blood pressure cuff and hoses should be positioned like those in
the following illustration.
408A
Microphone placement
A microphone is used to hear the Korotkoff sounds (K-sounds) that the blood
pressure monitor uses to determine the systolic and diastolic pressure readings. The
microphone can be placed in a microphone pad and adhered to the patient’s arm under
Hoses Routed Over
Shoulder
Cuff Anchor Clip
Cuff/Microphone
Connections
Draft