
User Manual Part 6


Alarms
2001989-301A- draft 1 ApexPro™ 5-9
NOTE
The following guidelines apply to changing Alarm Control settings at the CIC
Pro center:
The changes you make to the settings apply to the selected patient only and
are adopted by the patient’s monitor.
Some control settings for non-GE acquisition devices that are interfaced via
the Unity Network Interface Device or the OCTANET interface device are
not adjustable.
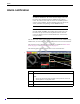
It may be necessary to use the scroll bar at the right side of the window to
view the appropriate alarm.
The control settings that are blue in color indicate this setting has already
been adjusted from the default value.
The patient or the acquisition device must be located in-unit.
Any out-of-unit patient alarm settings can be viewed, but not changed.
Monitor alarm control settings
Complete the following procedures to temporarily adjust the following monitor
Alarm Control settings for a selected patient:
Low/high parameter alarm limits and alarm levels.
Arrhythmia Alarm Levels.
NOTE
All changes are temporary and return to the default settings when the patient is
discharged.
To permanently change the Alarm Control settings for telemetry patients, see the
Telemetry Alarm Control Defaults section of the CIC Pro Clinical Information
Center Bedrock Hardware Platform Service Manual.
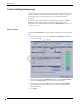
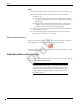
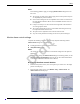
Displaying the alarm control window
1. From the multi-patient viewer, click on the patient you want to view. The single
patient viewer displays.
2. From the single patient viewer, click Monitor Setup > Alarm Control. The
Alarm Control window displays.
056A
Draft