
Logic HE Balanced Flue Log Installation User Instructions


8
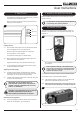
Setting the Hour
2b.35 Press and release the + or - button to change the hour to
the correct hour. Press SET to confirm and progress to
setting the minute.
7
Setting the Minutes
2b.36 Repeat the process to change the minutes.
Setting the Temperature Display (Celsius or Fahrenheit)
2b.37 Press and release the + or - button to toggle between C and
F. When the display shows the desired symbol, press and
release the SET button to store.
8
2b.38 To enter Advanced Settings, see below. To finish, place the
handset down and wait until the home screen is displayed
and the unlock light goes off.
ALL THE NECESSARY SETTINGS REQUIRED HAVE
NOW BEEN COMPLETED. ANY FURTHER
FUNCTIONS ON THIS HANDSET ARE FOR
FACTORY SETTING AND NOT TO BE USED.
The Handset is now ready to operate the appliance.
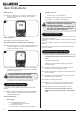
Advanced Menu Settings
It is possible to change additional preset settings of the control
features.
2b.39 Follow steps 2b.28 to 2b.38 to access the Advanced Menu
Settings. Press and release the SET button to enter the
Advanced Settings Menu.
Advanced Settings are:
Back Light (L)
- A = Automatic (default setting).
The backlight comes on in the dark.
- O = Light never comes on.
- 1 = Light comes on when the handset is unlocked.
User Instructions
Display Contrast (C)
- 8 Levels from 0 - 7 (Default level 4).
P = Pairing with devices other than the Control Box.
This feature is not available on this appliance.
IMPORTANT: THE FURTHER FUNCTIONS ON THIS
HANDSET ARE FOR FACTORY SETTING ONLY
AND ARE NOT TO BE USED.
PLACE THE HANDSET ON A FLAT SURFACE AND
WAIT UNTIL THE HOME SCREEN IS DISPLAYED
AND THE UNLOCK LIGHT TURNS OFF.
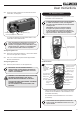
Paging the Handset
If the handset is lost it can be located by pressing the + only on the
Control Box for 5 seconds.
The handset will flash and make a noise for 60 seconds to indicate
where it is.
Pick up the Handset and cradle it to unlock. The flashing and noise
will stop.
If the handset is not discovered in 60 seconds the process will
need to be repeated.
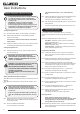
Changing the Default Timer Mode
It is possible to change the default time period for the Timer mode.
The default time period for Timer mode is factory set to
1 hour.
To change the default time:
Holding the remote to keep the green light on and the
handset unlocked:
2b.40 Press and hold the SET button until a beep is heard to
indicate the command has been received.
2b.41 Release the SET button. PROG will be displayed at the top
left of the display.
2b.42 Repeatedly press the MODE button until the Zzz symbol
flashes at the top of the display.
2b.43 Press and release the SET button.
2b.44 Press the + or - buttons to alter the default time period.
The timer can be set between 1 minute and 24 hours.
2b.45 After adjusting the time press SET again to confirm.
Note: This does not activate the Timer mode, see
Installation Section, Manual Operation or Thermostatic
Mode.