Your Gateway Computer componentguide Removable Storage Installing Configuring
Contents 1 Preparing to Install Your Drive . . . . . . . . . . . . . . . . . . . . . . . . . . . . . . . . . . . 1 Preparing your work area . . . . . . . . . . . . . . . . . . . . . . . . . . . . . . . . . . . . . . . . . . . . . 2 Preventing static electricity discharge . . . . . . . . . . . . . . . . . . . . . . . . . . . . . . . . 3 2 Removing an Existing Drive . . . . . . . . . . . . . . . . . . . . . . . . . . . . . . . . . . . . . 5 Removing drive software . . . . . . . . . . . . . . . . . . . . . .
ii
Preparing to Install Your Drive 1 This guide provides the information you need to install a new or replacement: ■ CD or DVD drive ■ Diskette drive ■ Flash memory drive ■ Tape drive ■ Zip drive Only the tape and Zip drives require uninstalling and installing software as part of the installation process.
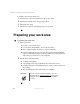
Chapter 1: Preparing to Install Your Drive To install a drive, follow these steps: 1 2 3 4 Remove drive software (if replacing a Zip or tape drive). Remove the existing drive (if replacing a drive). Install the new drive. Install drive software (if installing a Zip or tape drive). Preparing your work area To prepare your work area: 1 2 Find a place that: ■ Is clean. (Avoid dusty areas.) ■ Is a low-static environment. (Avoid carpeted areas.) ■ Has a stable platform on which to set your computer.
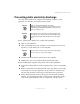
Preparing your work area Preventing static electricity discharge The components inside your computer are extremely sensitive to static electricity, also known as electrostatic discharge (ESD). Warning ESD can permanently damage electrostatic discharge-sensitive components in your computer. Prevent ESD damage by following ESD guidelines every time you open the computer case.
Chapter 1: Preparing to Install Your Drive 4 www.gateway.
Removing an Existing Drive 2 Read this chapter to learn how to remove an existing drive. You need to remove an existing drive if you are replacing a drive. If you are not replacing a drive, go to “Installing a New Drive” on page 13. Warning Avoid exposure to dangerous electrical voltages and moving parts by turning off your computer and unplugging the power cord and modem cable before opening the case.
Chapter 2: Removing an Existing Drive Removing drive software If you are installing a diskette, CD, or DVD drive, you do not need to remove any software. Go to “Installing a New Drive” on page 13. If you did not previously have a Zip drive or tape drive installed in your computer, you do not need to remove any software. Go to “Installing a New Drive” on page 13. If you are replacing a Zip drive or tape drive, you must uninstall your drive software before you remove the old drive from your computer.
Removing drive software 4 Click Add/Remove or Remove and follow the on-screen instructions. If you are asked to remove any shared files, click No. (These files may be needed by other programs.) 5 When the removal is complete, shut down Windows and turn off your computer. www.gateway.
Chapter 2: Removing an Existing Drive Removing the drive To remove the existing drive: 1 Turn off your computer, then remove the computer case cover following the static electricity precautions on page 3. See the documentation that came with your computer for instructions on removing your computer case cover. 2 If you are removing a CD or DVD drive, disconnect the audio cable by pressing down on the locking tab as you pull the cable out of the audio connector.
Removing the drive 4 Disconnect the front panel USB round data cable from the back of the flash memory drive. Make sure that you pull the connector, not the cable. Note the orientation of the connector. You will attach the data cable to your new drive using the same orientation. www.gateway.
Chapter 2: Removing an Existing Drive 5 10 Disconnect the flash memory drive’s round data cable from the system board. Make sure that you pull the connector, not the cable. Note the orientation of the connector. You will attach the data cable from your new drive using the same orientation. www.gateway.
Removing the drive 6 Disconnect the power cable from the back of the drive. Make sure that you pull the connector, not the cable. Move the connector slightly side-to-side, if necessary, to disconnect the cable. 7 See the documentation that came with your computer for instructions on sliding the drive out of the computer case. 8 If this drive is a replacement for a failed drive, follow the instructions on the return form to send the old drive back to Gateway for credit. www.gateway.
Chapter 2: Removing an Existing Drive 12 www.gateway.
Installing a New Drive 3 Read this chapter to learn how to: ■ Configure IDE and SCSI drives ■ Install the drive 13
Chapter 3: Installing a New Drive Identifying connectors The following illustrations identify basic drive connectors. CD, DVD, diskette, tape, and Zip drives Power cable and connector Data cable and connector Jumper block Analog audio connector Digital audio connector Diskette drive power cable and connector 14 CD or DVD drive power cable and connector ■ Power connector. Both small and large power supply connectors attach only one way. CD, DVD, tape, and Zip drives have a large power connector.
Identifying connectors ■ Jumper block. The jumper block is used to configure your IDE drive as a master, slave, or cable select drive, or to configure your SCSI drive’s ID and termination. A label on the drive shows which jumper/pin position corresponds to which setting. Diskette drives do not have a jumper block. ■ Analog audio connector. If your drive is a CD or DVD drive, it may have an analog audio connector. ■ Digital audio connector.
Chapter 3: Installing a New Drive Configuring the new IDE drive You can configure CD, DVD, diskette, and Zip drives as bootable drives. You can use bootable drives to start up (boot) your computer with special bootable media, such as a system diskette (a diskette that contains operating system files). Your system board may contain as many as three controllers (where the wide ribbon cables attach to the main system board or a host adapter add-in card). One controller is for the diskette drive.
Configuring the new IDE drive Master drives If the drive you are installing is on the end of the cable, it is the master drive. Master drives are typically bootable, meaning they are used to boot, or start, your computer. Your IDE drive should be configured as a master if it will be the only drive connected to the IDE data cable or if there will be two drives connected to the cable and the other drive is configured as a slave.
Chapter 3: Installing a New Drive Setting the IDE jumpers IDE drives contain a jumper block. A jumper block is a set of pins located on the drive. The jumper block is typically located on the rear of the drive, although it may be located on the top or the bottom of the drive. On some IDE drives, a jumper is placed over two of the pins to configure the drive as the master (or single) drive or as the slave drive.
Configuring the new IDE drive To set the jumpers for an IDE drive: 1 Look at the jumper label to find the jumpers for setting a master, a slave, or a cable select drive. The label is either a sticker on the drive, or it is printed directly on the drive. 2 If both of the drives and the IDE data cable support cable select, set the jumpers for the drives as cable select. IDE data cables that support cable select should be labeled CS.
Chapter 3: Installing a New Drive Configuring the new SCSI drive If your computer contains SCSI devices, they are connected to a SCSI host adapter add-in card. To configure SCSI devices correctly on the SCSI cable, you must designate (terminate) the ends of the chain and determine the order of the links (IDs) between the ends of the SCSI chain.
Configuring the new SCSI drive SCSI IDs In addition to recognizing the ends of the SCSI chain, your computer needs to designate the order of the links. For this reason, each device on the SCSI chain requires a unique device ID. This ID can be any number between 0 and 15 (for Ultra Wide SCSI) other than 7, which is the factory preset for the host adapter. The ID number (address) can be set on most SCSI devices by adjusting jumpers on pins. Setting the SCSI jumpers SCSI drives contain a jumper block.
Chapter 3: Installing a New Drive 5 Check SCSI termination. Example A: SCSI Termination where a SCSI tape drive is the last or only SCSI device. Example B: SCSI Termination in a computer with three internal SCSI devices.
Installing a drive Installing a drive This section tells you how to install the drive and how to attach the cables. To install a drive: 1 Slide the drive into the bay and secure the drive in the drive bay by following the instructions in your computer user’s guide. 2 If your drive is a CD or DVD drive, connect the audio cable.
Chapter 3: Installing a New Drive 4 If you are installing a CD, DVD, diskette, tape, or Zip drive, connect the data cable to the back of the drive. Be careful not to force the cable connector or bend any of the pins. Follow the data cable from the connection on the drive to the other end of the cable. Make sure that the cable is connected securely to the data cable connector on the main system board or the SCSI host adapter card.
Installing a drive 5 Connect the front panel USB round data cable to the back of the flash memory drive. Be careful not to force the cable connector or bend any of the pins. www.gateway.
Chapter 3: Installing a New Drive 26 6 Connect the flash memory drive’s round data cable to the Front Panel USB connector on the system board. Be careful not to force the cable connector or bend any of the pins. 7 Check all cables in your computer. Make sure that all are connected securely and that the cables are routed so that they will not bind or crimp when you replace the computer case cover. 8 Replace the computer case cover.
Installing a drive 10 Turn on your computer. ■ If you installed a flash memory drive, you are finished. Stop here. ■ If you installed a diskette, CD, or DVD drive, go to “Configuring the BIOS” on page 28. ■ If you installed a Zip drive and want it to be bootable, go to “Configuring the BIOS” on page 28. If you do not want the Zip drive to be bootable, go to “Installing Zip drive software” on page 30. ■ If you installed a Seagate tape drive, go to “Installing Seagate tape drive software” on page 31.
Chapter 3: Installing a New Drive Configuring the BIOS If you are installing a SCSI drive, you do not need to configure the BIOS. The installation is complete. A boot drive is a drive that can be used to start your computer. If you have multiple boot drives, you can specify their boot order.
Configuring the BIOS 5 Specify which devices you want to boot from, and in which order. ■ To specify your 3.5-inch, 1.44 MB diskette drive, select Floppy. ■ To specify the Zip drive, select Floptical if your computer is running AMI BIOS, or select Iomega Zip if your computer is running Phoenix BIOS. 6 If your BIOS contains the option Removable Devices, set the boot order for your multiple drives, then press ESC. 7 If you removed the 3.
Chapter 3: Installing a New Drive Installing Zip drive software If you installed a Zip drive, you need to install additional software. Use the Iomegaware™ CD to install your Zip drive software. Important If you are installing in Windows NT 4.0, Service Pack 4 (or greater) is required for Zip compatibility. You must have administrator privileges for your local computer to install the Zip drive software and to run the ToolsNT utilities. If you reinstall Windows NT 4.
Installing Seagate tape drive software Installing Seagate tape drive software If you installed a Seagate tape drive, you need to install additional software. Use the Seagate Backup Exec™ CD to install your tape drive software. Important If your computer is running Windows NT 4.0, you must have administrator privileges for your local computer to install the Seagate Backup Exec software. If you reinstall Windows NT 4.0, you may need to reinstall the Seagate Backup Exec software.
Chapter 3: Installing a New Drive 32 www.gateway.
Troubleshooting 4 This chapter provides some solutions to common drive problems.
Chapter 4: Troubleshooting General troubleshooting guidelines If your computer does not recognize the new drive, try these troubleshooting tips before calling Gateway Technical Support: 34 ■ Review the installation procedures. Make sure that you did not skip any of the steps. ■ Reconnect the power cable on the drive. ■ Reconnect the data ribbon cable on the drive. Make sure that the red-stripe edge of the data ribbon cable aligns with Pin 1 on your drive.
CD or DVD drive CD or DVD drive Some of the steps in this section may require you to remove the computer case cover. Follow “Preventing static electricity discharge” on page 3 when working inside your computer. Your computer does not recognize the CD or DVD drive. ■ Make sure that the CD or DVD label is facing up, then try again. ■ Try a different CD. Occasionally CDs are flawed and cannot be read by the CD or DVD drive. ■ Shut down and restart your computer. ■ Clean the disc.
Chapter 4: Troubleshooting Audio CD does not produce sound. ■ Make sure that the CD label is facing up, then try again. ■ Some CDs have copy protection software. You may not be able to play these CDs on your computer. ■ If you have two CD drives, try the other drive. ■ Check the speaker cables. Make sure that they are connected correctly and securely. ■ Make sure that the volume controls are turned up. For more information about volume controls, see the documentation that came with your computer.
Diskette drive Diskette drive Some of the steps in this document may require you to remove the computer case cover. Follow “Preventing static electricity discharge” on page 3 when working inside your computer. Your computer cannot access the diskette drive. You may not be able to copy information to or from the diskette drive if: ■ The diskette is write-protected. ■ The diskette drive or diskette is damaged. ■ The settings in the BIOS are incorrect.
Chapter 4: Troubleshooting 3 Right-click the icon for the diskette drive, click Format, then click Start. Caution Any information on the diskette is deleted when you format the diskette. Your computer does not recognize the diskette drive. ■ If the diskette drive is identified incorrectly in the BIOS, you may not be able to start from or format a diskette.
Diskette drive ■ If you have checked the BIOS settings and the settings are correct, the problem may be a poor connection between the diskette drive and the system board. Because no locking clips hold the diskette drive cable in place, the cable may need to be reseated. To reseat the cable: 1 Turn off your computer, then remove the computer case cover following the static electricity precautions on page 3.
Chapter 4: Troubleshooting ■ If you have recently added any hardware to the computer, such as a tape backup unit, sound card, scanner, or network card, try removing these items from the computer one at a time. Each time you remove an item, try to start your computer using a system diskette or try to format a diskette. If the diskette drive works, it is possible the hardware that was added may be conflicting with the diskette drive.
Diskette drive Diskette drive error messages Diskette Drive 0 Failure or Diskette Drive 1 Failure This error is usually seen as the computer starts up. ■ Check the BIOS to make sure that the drives are identified correctly. ■ Open the computer and reseat the diskette drive cable. ■ Try another diskette drive cable. Not ready reading drive A or Not ready reading drive B ■ Make sure that the drives are correctly identified in the BIOS. For more information, see “Configuring the BIOS” on page 28.
Chapter 4: Troubleshooting Flash memory drive Some of the steps in this document may require you to remove the computer case cover. Follow “Preventing static electricity discharge” on page 3 when working inside your computer. The green LED does not turn on. ■ Make sure that your computer is receiving power. ■ Make sure that the power cable connection to the flash memory drive is secure. ■ Make sure that there is a flash memory card in the drive. The green LED blinks on and off.
Zip drive Cannot copy songs from a Secure Digital memory card to my computer. Secure Digital memory cards have copy protection algorithms that prevent you from copying copyrighted material from the card to another device. You can play copyrighted files from the memory card, but you cannot copy the copyrighted files from the memory card. Zip drive Some of the steps in this section may require you to remove the computer case cover.
Chapter 4: Troubleshooting ■ Make sure that the software drivers for the Zip drive are correctly installed. See “Installing Zip drive software” on page 30. ■ If your computer’s operating system is Windows 98, make sure that the operating system is running in 32-bit mode (Protected mode). To determine if the operating system is running in 32-bit mode: 1 2 Right-click the My Computer icon, then click Properties.
Tape drive Tape drive Some of the steps in this section may require you to remove the computer case cover. Follow “Preventing static electricity discharge” on page 3 when working inside your computer. After a period of successful operation, the tape drive appears to fail during a backup or restore. ■ Make sure that all cables are securely connected and jumpers are set appropriately. ■ Turn your computer off, then restart your computer.
Chapter 4: Troubleshooting Cleaning a tape drive. The tape drive needs to be cleaned. You can clean the drive using one of two methods: ■ Use a Travan cleaning cartridge ■ Clean the drive head manually To clean the drive head manually: 1 Moisten a clean, foam-tip swab in isopropyl alcohol. The swab should be wet but not dripping. 2 Hold the drive access door open and gently wipe the tape head using an up-and-down motion. 3 Use a second swab saturated in isopropyl alcohol to wipe the capstan.
Tape drive Your computer does not recognize your new SCSI tape drive or other SCSI devices: ■ Make sure that you have correctly installed the Seagate Backup Exec software. ■ Make sure that all cables are attached securely. ■ Check the SCSI ID of each device in the SCSI chain to make sure that no two devices have the same ID number (the controller is usually ID 7 and the bootable hard drive is usually ID 0). ■ Make sure that SCSI termination is set correctly for each SCSI device.
Chapter 4: Troubleshooting Getting technical support If none of these solutions resolve your drive problems, contact Gateway Technical Support for further assistance. For information about the different methods for contacting Gateway Technical Support, see the user’s guide that came with your computer. 48 www.gateway.
Safety, Regulatory, and Legal Information A Regulatory compliance statements United States of America Federal Communications Commission (FCC) Unintentional emitter per FCC Part 15 This device has been tested and found to comply with the limits for a Class B digital device, pursuant to Part 15 of the FCC rules. These limits are designed to provide reasonable protection against harmful interference in a residential installation.
Appendix A: Safety, Regulatory, and Legal Information This equipment generates, uses, and can radiate radio frequency energy and, if not installed and used in accordance with the instructions, may cause harmful interference to radio or television reception. However, there is no guarantee that interference will not occur in a particular installation.
Regulatory compliance statements Laser safety statement All Gateway systems equipped with CD and DVD drives comply with the appropriate safety standards, including IEC 825. The laser devices in these components are classified as “Class 1 Laser Products” under a US Department of Health and Human Services (DHHS) Radiation Performance Standard. Should the unit ever need servicing, contact an authorized service location.
Appendix A: Safety, Regulatory, and Legal Information Notices Copyright © 2003 Gateway, Inc. All Rights Reserved 14303 Gateway Place Poway, CA 92064 USA All Rights Reserved This publication is protected by copyright and all rights are reserved. No part of it may be reproduced or transmitted by any means or in any form, without prior consent in writing from Gateway. The information in this manual has been carefully checked and is believed to be accurate. However, changes are made periodically.
MAN US REMOVE STORAGE INST R6 5/03