
User Guide


Replacing convertible notebook components
52
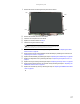
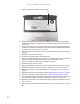
13 Remove the screw from the top of the palm rest.
14 Starting on the right side, lift the palm rest assembly up and away from the convertible
notebook. Be careful when pulling the palm rest assembly away from the bottom near the
docking port.
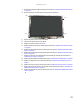
15 Turn the palm rest over so the bottom is facing up, then remove the optional fingerprint
reader from the old palm rest and install it on the new palm rest by following the instructions
in “Replacing the fingerprint reader” on page 53.
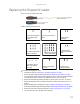
16 Place the new palm rest assembly onto the convertible notebook, then snap the assembly
into place.
17 Replace the screw removed in Step 13.
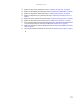
18 Connect the fingerprint reader to the system board.
19 Make sure the black touchpad connector clip is in the raised position, insert the cable into
the connector, then lower the black connector clip to lock the cable in place.
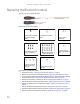
20 Turn the convertible notebook over so the bottom is facing up.
21 Replace the screws removed in Step 9.
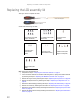
22 Replace the LCD assembly by following the steps in “Replacing the LCD assembly” on page 40.
23 Replace the keyboard by following the steps in “Replacing the keyboard” on page 28.
24 Replace the keyboard cover by following the steps in “Replacing the keyboard cover” on
page 27.
25 Replace the hinge covers by following the steps in “Replacing the hinge covers” on page 26.
26 Replace the hard drive by following the steps in “Replacing the hard drive” on page 21.
27 If the convertible notebook has wireless networking built in, plug the wireless antennas back
in by following the steps in “Replacing the IEEE 802.11 wireless card” on page 16.
28 Replace the wireless bay cover by following the steps in “Replacing the IEEE 802.11 wireless
card” on page 16.
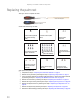
29 Insert the bay module by following the instructions in “Replacing a bay module” on page 7.
Screw