
User Guide

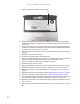

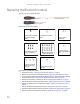

Replacing convertible notebook components
48
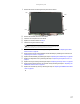
Replacing the LCD assembly lid
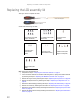
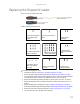
Tools you need to complete this task:
v
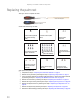
Screws removed during this task:
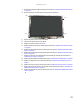
To replace the LCD assembly lid:
1 Complete the steps in “Preparing the convertible notebook” on page 5.
2 If the convertible notebook has wireless networking built in, unplug the wireless antennas
by following the steps in “Replacing the IEEE 802.11 wireless card” on page16.
3 Remove the hinge covers by following the steps in “Replacing the hinge covers” on page 26.
4 Remove the keyboard cover by following the steps in “Replacing the keyboard cover” on
page 27.
5 Remove the LCD assembly by following the steps in “Replacing the LCD assembly” on page 40.
6 Remove the inverter by following the instructions in “Replacing the inverter” on page 31.
7 Remove the power button board by following the instructions in “Replacing the power button
board” on page 34.
8 Remove the tablet button board by following the instructions in “Replacing the tablet button
board” on page 37.
Flat-blade driver Scribe or non-marring tool- OR -
Phillips #0 screwdriver
4 or 6 black 2.5*8.0 (LCD
hinge to notebook)
4 black 2.5*8.0 (LCD
panel)
4 or 8 black 2.5*5.0 (LCD
panel front)
1 chrome 2.5*2.5
(Inverter)
2 chrome 2.5*6.0
(Power button
board)
2 chrome 2.5*6.0
(Tablet button board)
4 black 2.5*3.5 (LCD
hinge to LCD panel)