
User Guide


Replacing convertible notebook components
36
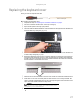
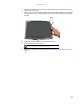
8 Remove the two screws that connect the power button board to the front of the LCD panel
assembly, then remove the board.
9 Install the new power button board.
10 Replace the screws that were removed in Step 8, then reconnect the cable.
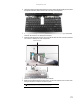
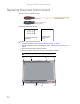
11 Press the LCD panel front and back together. Press the two halves together in several places
until they click in place. You should find no loose spots or spots where the two halves do
not meet.
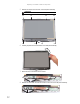
12 Replace the LCD panel assembly screws removed in Step 5.
13 Replace the inserts removed in Step 4.
14 Replace the keyboard cover by following the steps in “Replacing the keyboard cover” on
page 27.
Caution
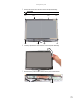
The larger rubber inserts go across the top of the panel.
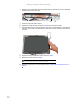
Screw
Screw