
Brochure

Gastite Division, Titeflex Corporation
1116 Vaughn Parkway / Portland, TN 37148
800.662.0208 / www.gastite.com / gastite@gastite.com
48
April 2015
..
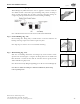
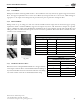
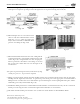
Step 1 Cut-to-Length (Fig. 4-23)
Cut tubing to the desired length leaving approximately one inch for fitting
attachment. Cut should be centered between two corrugations. Use light roller
pressure with extra rotations in one direction to leave tubing round and free of
burrs. Note: To ensure a quality flare, all cuts should be made on a straight section
of tubing.
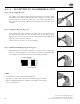
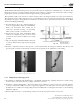
Step 2 Strip Jacket (Fig. 4-24, Fig. 4-25)
Using a utility knife, strip jacket back to the valley of the second corrugation. Do
not cut the jacket in such a way that the sealing surface of the tubing is scored.
e short piece of jacket can easily be removed by placing the utility knife blade
under the jacket to peel the jacket off.
Caution: Tube ends are sharp, use care when handling.
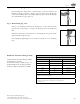
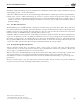
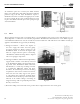
Step 3 Install Nut and Bushings (Fig. 4-26, Fig. 4-27)
read fitting body into appliance. Slide nut over tubing. Separate bushings and
position, as shown in Figure 4-27, into the valley of the first corrugation leaving
one corrugation exposed between the end of the bushing and tubing.
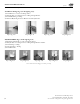
NOTE:
• Foil biting feature must be utilized with FlashShield.
• Pipe dope or sealant must not be used inside the fitting prior to assembly.
• e use of FlashShield fittings in combination with Gastite yellow tubing
is an acceptable practice.
Fig. 4-23
Fig. 4-24
Fig. 4-25
Fig. 4-26
Fig. 4-27
Foil Biting Feature