
Guide


Contact DeLorme Professional Sales for support: 1-800-293-2389 Page 88
994 - The tab manager program does not exist. Our installation was broken somehow if the tab
manager program cannot be found.
Any other error code indicates that the Tab Manager program failed in
some way.
Toolbar configuration
You can create a custom toolbar configuration by editing the toolbar scheme file (default.toolbar) in the
XMap install directory. The file is located in C:\Program Files\DeLorme\XMap
7\default_toolbarschemes_XMap7 by default. Tool group order, content, and default active state can be
changed.
Before editing the default.toolbar file, be sure to save the original file with a different name in the event
that you need to revert back to the original toolbar configuration at a later time. XMap automatically looks
for default.toolbar as the current file to use for the toolbar, so whichever toolbar configuration you use, it
must be named default.toolbar before it will be detected by the system.
You can perform edits to the toolbar file in a text editor like Notepad. Be sure to use the exact same
syntax and formatting that was used in the original default.toolbar file when performing the edits. A single
mistake (like a missing > symbol) in the toolbar file will result in the entire toolbar disappearing in XMap.
Customized toolbar files must be manually disseminated and saved to each user’s
default_toolbarschemes_XMap7 folder before they can take effect on those computers.
Adding Existing Database Connections
If you have existing databases that you want XMap to connect to, you can add the connections through
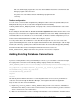
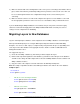
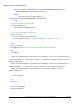
the registry. Each connection can be added by adding a registry similar to the following:
[HKEY_CURRENT_USER\Software\DeLorme\XMap7\DeLormeComponents\DeLorme.XMap7.Lay
ers_Component.1\OpenSpaceServers\_my_server__my_instance_my_database]
"ServerName"="my_server\\my_instance"
"DatabaseName"="my_database"
"Lg"=""
"Ps"=""
This will only work for NTLM connections. If connecting with a SQL server user, then you will have to
create the connection through the Database Manager, or through the GIS tab in the application.
Steps to make sure this connection will work:
1) Replace my_server, my_instance, and my_database with your own server, instance, and database
information. Note that if you do not have a named instance, then don’t include my_instance and leave
out the ‘\’ between the server and instance.
2) Make sure the SQL browse service is running on the database server to which the client will connect.