
User manual
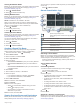

Table Of Contents
- Table of Contents
- Getting Started
- Installation
- Off-Road Navigation Features
- Using the Map
- Using the Apps
- Live Services, Traffic, and Smartphone Features
- Bluetooth Feature Status Icons
- Pairing Your Phone and Headset
- Smart Notifications
- Hands-Free Calling
- Setting Up Bluetooth Features for Your Apple® Device
- Setting Up Bluetooth Features for Your Smartphone with Android™
- Enabling or Disabling Bluetooth Features for Your Headset
- Disconnecting a Bluetooth Device
- Deleting a Paired Phone
- Street Navigation
- Finding and Saving Locations
- Finding a Location Using the Search Bar
- Points of Interest
- Finding a Location by Category
- Viewing Your Garmin Explore Points of Interest
- Location Search Results
- Changing the Search Area
- Finding Parking Near Your Current Location
- Finding Parking Near a Specified Location
- Search Tools
- Finding HISTORY Points of Interest
- Finding National Parks
- Finding Ultimate Campgrounds Points of Interest
- Finding iOverlander™ Points of Interest
- Finding Powersport Points of Interest
- Tripadvisor
- Viewing Recently Found Locations
- Viewing Current Location Information
- Adding a Shortcut
- Saving Locations
- Rider Awareness Features and Alerts
- Settings
- Device Information
- Device Maintenance
- Troubleshooting
- My device is not acquiring satellite signals
- My battery does not stay charged for very long
- My device does not connect to my phone
- My device does not appear as a removable drive on my computer
- My device does not appear as a portable device on my computer
- My device does not appear as either a portable device or a removable drive or volume on my computer
- Appendix
- Garmin PowerSwitch
- Wireless Cameras
- Installing a Memory Card for Maps and Data
- Data Management
- Viewing GPS Signal Status
- Purchasing Additional Maps
- Index

Planning a Trip
A trip can include many destinations, and it must include at least
a starting location and one destination. The starting location is
the location from which you plan to start your trip. If you start
navigating the trip from a different location, the device gives you
the option to route to your starting location first. For a round trip,
the starting location and final destination can be the same.
1
Select > Trip Planner > New Trip.
2
Select Select Start Location.
3
Choose a location for your starting point, and select Select.
4
Select Select Destination.
5
Choose a location for a destination, and select Select.
6
Select Add Location to add more locations (optional).
7
After you have added all the necessary locations, select Next
> Save.
8
Enter a name, and select Done.
Editing and Reordering Locations in a Trip
1
Select > Trip Planner > Saved Trips.
2
Select a saved trip.
3
Select a location.
4
Select an option:
• To move the location up or down, select , and drag the
location to a new position in the trip.
• To add a new location after the selected location, select
.
• To remove the location, select .
Optimizing the Order of Destinations in a Trip
The device can automatically optimize the order of destinations
in your trip to create a shorter, more efficient route. The starting
location and final destination are not changed when you
optimize the order.
While editing a trip, select > Optimize Order.
Discovering Attractions Along Your Trip
The device can suggest interesting or popular attractions to add
to your trip.
1
While editing a trip, select > Suggest Attractions.
2
Select an attraction to view more information.
3
Select Select to add the attraction to your trip.
Changing Routing Options for a Trip
You can customize how the device calculates the route when
you start your trip.
1
Select > Trip Planner > Saved Trips.
2
Select a saved trip.
3
Select the vehicle profile icon, and select the vehicle you plan
to use while navigating the trip (optional).
4
Select .
5
Select Route Preference to change the calculation mode for
the trip (Changing the Route Calculation Mode, page 16).
Changing Transportation Modes in a Trip
You can change the transportation modes used to travel in a
saved trip.
1
Select > Trip Planner.
2
Select a trip.
3
Select the vehicle icon.
4
Select a transportation mode.
5
Select Select.
Navigating to a Saved Trip
1
Select > Trip Planner > Saved Trips.
2
Select a saved trip.
3
Select Go!.
4
Select the first location to navigate to, and select Start.
The device calculates a route from your current location to
the selected location, and then it guides you to the remaining
trip destinations in order.
Sharing a Route
You can share routes with other Tread devices.
1
Select > Share Route.
2
Select an option:
• To share a route using Tread, select Garmin Tread™.
• To share a route using a Bluetooth connection, select
Bluetooth.
• To copy the route to a microSD card, select Memory
Card.
3
Select a route.
4
Select Done.
5
Follow the on-screen instructions on your Tread device to
complete the sharing process.
TracBack
®
Following Your Recent Track
The TracBack feature records the most recent segment of your
movement. You can retrace your recent track back to a previous
location.
1
Select > TracBack.
Your recent track appears on the map.
2
Select Go!.
Saving Your Recent Track as a Trip
You can save your recent track as a trip, which you can navigate
later using the trip planner (Navigating to a Saved Trip,
page 10).
1
Select TracBack.
Your recent track appears on the map.
2
Select > Save as Trip.
3
Enter a name, and select Done.
Viewing the Weather Forecast
NOTICE
Garmin is not responsible for the accuracy or timeliness of the
weather data.
Before you can use this feature, your device must be receiving
weather data. You can connect your device to the Tread app to
receive weather data (Pairing Your Phone and Headset,
page 13).
1
Select > Weather.
The device shows the current weather conditions and a
forecast for the next several days.
2
Select a day.
The detailed forecast for that day appears.
Viewing Weather Near a Different City
1
Select > Weather > Current Location.
2
Select an option:
• To view weather for a favorite city, select a city in the list.
• To add a favorite city, select Add City, and enter a city
name.
10 Using the Apps