
Operation Manual


Table Of Contents
- GPSMAP 172/172C
- Introduction
- Getting Started
- Keypad Usage
- Selecting Options
- Entering Data
- Initializing the Receiver
- Power On/Screen Backlighting
- Simulator Mode
- Main Pages/Map Page
- Map Cursor
- Marking Waypoints
- Using the NAV Key
- Simulated Tour
- Reviewing/CreatingMap Waypoints
- Compass Navigation Page
- Highway Page
- Active Route Page/Main Menu Page
- Deleting Waypoints/Powering Off Unit
- Reference
- Map Page
- Map Page: Cursor
- Map Page: Options
- Compass Page
- Highway Page
- Highway Page Options
- Creating Waypoints
- Reviewing/Editing Waypoints
- Waypoint Lists
- Going to a Destination
- TracBack Navigation
- MOB: Man OverBoard
- Creating Routes
- Creating a Route/Following a Route
- Route List Page
- Route Review Page
- Editing Routes
- Active Route Page
- Find Key
- Find Options
- Main Menu Tabs
- Main Menu:GPS Tab
- Main Menu:Tide Tab
- Main Menu: Trip/
- Main Menu: Track Tab
- Main Menu: DSC Tab
- Main Menu: DSC/Card Tabs
- Main Menu: Temp Tab/Setup Tab
- Main Menu: Comm Tab
- Main Menu: Alarm Tab
- Appendix
- Index
Going to a Destination
GPS is all about marking positions as waypoints and navigating to them using the receiver’s steer-
ing guidance and map displays. We’ve already seen how to use the ENTER/MARK key to store our
present position, so it’s time to move on to the fun part—going to a destination.
The NAV/MOB key, located on the keypad above the QUIT key, is the primary tool used to select a
destination waypoint, TracBack, or a route to navigate. The NAV key can be used in two primary ways:
• Pressing
NAV once displays a list of options from which you can select ‘Go To Point’, ‘Follow
Route’, ‘Follow Track’, or ‘Stop Navigation’.
• Highlighting an on-screen waypoint or map item as a destination directly from the Map Page
and pressing NAV allows you to graphically select points to “Go To”.
For our simulated trip, you’re going to select a pre-programmed tour route using the first method.
This also shows how the MENU key is used throughout the GPSMAP 172/172C system to provide tab
style options and functions. Let’s start by changing the position to where the practice route is located.
To change the GPSMAP 172/172C position in simulator mode:
1. Press the MENU key twice to display the list of Main Menu tab items.
2. Use the UP or DOWN arrow of the ARROW KEYPAD to highlight the ‘Setup’ tab, then LEFT or
RIGHT to highlight the ‘System’ submenu tab.
3. Highlight ‘Set Position’ in the simulator setup window and press ENTER.
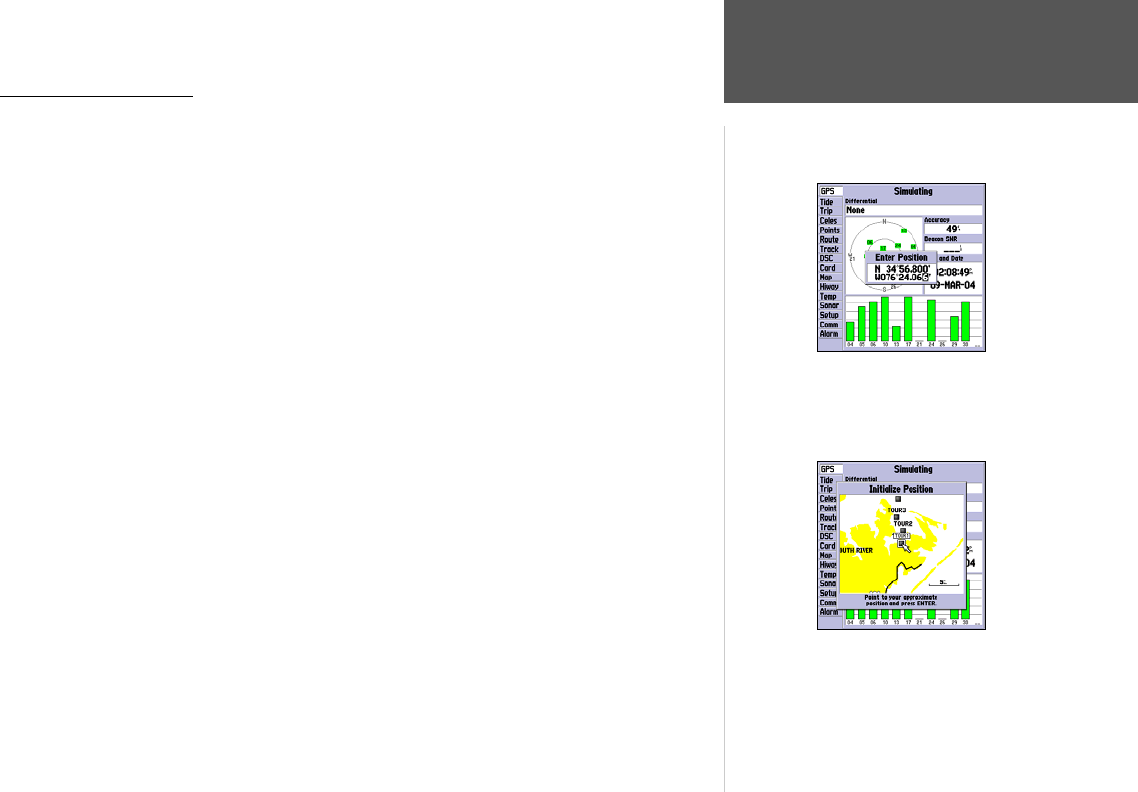
4. From the Initialize Position page, press the
MENU key. You see ‘Enter As Text’ highlighted, then
press ENTER.
5. On the Enter Position window, press ENTER then use the ARROW KEYPAD to enter N34°56.800’,
W076°24.066’ and press ENTER when done, then press QUIT to return to the Map Page.
Text entry for simulator position.
For future practice, you may skip steps
3 and 4 and point to a location from the
Initialize Position page.
11
Getting Started
Using the NAV Key