
User manual


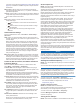

Table Of Contents
- Table of Contents
- Introduction
- Customizing the Chartplotter
- Home Screen
- Customizing Pages
- Presets
- Setting the Vessel Type
- Adjusting the Backlight
- Adjusting the Color Mode
- Turning On the Chartplotter Automatically
- Enabling Screen Lock
- Automatically Turning Off the System
- ActiveCaptain App
- Communication with Wireless Devices
- Charts and 3D Chart Views
- Navigation Chart and Fishing Chart
- Premium Charts
- Automatic Identification System
- Chart Menu
- Supported Maps
- Garmin Quickdraw Contours Mapping
- Mapping a Body of Water Using the Garmin Quickdraw Contours Feature
- Adding a Label to a Garmin Quickdraw Contours Map
- Garmin Quickdraw Community
- Garmin Quickdraw Contours Settings
- Navigation with a Chartplotter
- Basic Navigation Questions
- Destinations
- Waypoints
- Marking Your Present Location as a Waypoint
- Creating a Waypoint at a Different Location
- Marking an SOS Location
- Projecting a Waypoint
- Viewing a List of all Waypoints
- Editing a Saved Waypoint
- Moving a Saved Waypoint
- Browsing for and Navigating to a Saved Waypoint
- Deleting a Waypoint or an MOB
- Deleting All Waypoints
- Routes
- Creating and Navigating a Route From Your Present Location
- Creating and Saving a Route
- Viewing a List of Routes and Auto Guidance Paths
- Editing a Saved Route
- Browsing for and Navigating a Saved Route
- Browsing for and Navigating Parallel to a Saved Route
- Initiating a Search Pattern
- Deleting a Saved Route
- Deleting All Saved Routes
- Auto Guidance
- Tracks
- Showing Tracks
- Setting the Color of the Active Track
- Saving the Active Track
- Viewing a List of Saved Tracks
- Editing a Saved Track
- Saving a Track as a Route
- Browsing for and Navigating a Recorded Track
- Deleting a Saved Track
- Deleting All Saved Tracks
- Retracing the Active Track
- Clearing the Active Track
- Managing the Track Log Memory During Recording
- Configuring the Recording Interval of the Track Log
- Boundaries
- Deleting All Saved Waypoints, Tracks, Routes, and Boundaries
- Sailing Features
- Sonar Fishfinder
- Stopping the Transmission of Sonar Signals
- Changing the Sonar View
- Traditional Sonar View
- Garmin ClearVü Sonar View
- SideVü Sonar View
- Panoptix Sonar Views
- Selecting the Transducer Type
- Selecting a Sonar Source
- Creating a Waypoint on the Sonar Screen
- Pausing the Sonar Display
- Viewing Sonar History
- Sonar Sharing
- Adjusting the Level of Detail
- Adjusting the Color Intensity
- Sonar Recordings
- Traditional, Garmin ClearVü, and SideVü Sonar Setup
- Setting the Zoom Level on the Sonar Screen
- Setting the Scroll Speed
- Adjusting the Range of the Depth or Width Scale
- Sonar Noise Rejection Settings
- Sonar Appearance Settings
- Sonar Alarms
- Advanced Sonar Settings
- Traditional, Garmin ClearVü, and SideVü Transducer Installation Settings
- Sonar Frequencies
- Turning On the A-Scope
- Panoptix Sonar Setup
- Zooming in a Panoptix LiveVü or LiveScope Sonar View
- Adjusting the RealVü Viewing Angle and Zoom Level
- Adjusting the RealVü Sweep Speed
- LiveVü Forward and FrontVü Sonar Menu
- LiveVü and FrontVü Appearance Settings
- RealVü Appearance Settings
- LiveScope and Perspective Sonar Menu
- LiveScope and Perspective Sonar Setup
- LiveScope and Perspective Appearance Settings
- Panoptix Transducer Installation Settings
- Radar
- Radar Interpretation
- Transmitting Radar Signals
- Adjusting the Radar Range
- MotionScope™ Doppler Radar Technology
- Enabling a Guard Zone
- MARPA
- Echo Trails
- Radar Settings
- Selecting a Different Radar Source
- Changing the Radar Mode
- Autopilot
- Force® Trolling Motor Control
- Digital Selective Calling
- Gauges and Graphs
- inReach® Messages
- Digital Switching
- Dometic® Optimus® Features
- Tide, Current, and Celestial Information
- Warning Manager
- Media Player
- Opening the Media Player
- Selecting the Media Device and Source
- Playing Music
- Adjusting the Volume
- VHF Radio
- Radio
- DAB Playback
- SiriusXM Satellite Radio
- Setting the Device Name
- Updating the Media Player Software
- SiriusXM Weather
- SiriusXM Equipment and Subscription Requirements
- Weather Data Broadcasts
- Weather Warnings and Weather Bulletins
- Changing the Weather Chart
- Viewing Precipitation Information
- Forecast Information
- Viewing Fish Mapping Data
- Viewing Sea Conditions
- Viewing Sea Temperature Information
- Visibility Information
- Viewing Buoy Reports
- Weather Overlay
- Viewing Weather Subscription Information
- Viewing Video
- Selecting a Video Source
- Networked Video Devices
- Configuring the Video Appearance
- Garmin VIRB® Action Cameras
- HDMI Out Video Considerations
- Pairing the GC™ 100 Camera with a Garmin Chartplotter
- Device Configuration
- Sharing and Managing User Data
- Appendix
- Index

you avoid running aground (Setting the FrontVü Depth Alarm,
page 33). This alarm is available only with Panoptix FrontVü
transducers.
Water Temp.: Sets an alarm to sound when the transducer
reports a temperature that is 2°F (1.1°C) above or below the
specified temperature.
Contour: Sets an alarm to sound when the transducer detects a
suspended target within the specified depth from the surface
of the water and from the bottom.
Fish
Fish: Sets an alarm to sound when the device detects a
suspended target.
• sets the alarm to sound when fish of all sizes are
detected.
• sets the alarm to sound only when medium or large
fish are detected.
• sets the alarm to sound only when large fish are
detected.
Advanced Sonar Settings
From a Traditional sonar view, select Menu > Sonar Setup >
Advanced.
Shift: Allows you to set the depth range on which the sonar is
focused. This allows you to zoom in a higher resolution in the
focused depth.
When using shift, bottom tracking may not work effectively,
because the sonar looks for data within the depth range of
the focused area, which may not include the bottom. Using
shift also can impact the scroll speed, because data outside
the depth range of the focused area is not processed, which
reduces the time required to receive and display the data.
You can zoom in to the focused area, which enables you to
evaluate target returns more closely at a higher resolution
than just zooming alone.
Btm. Srch. Limit: Limits the search for the bottom to the depth
selected when the Range setting is set to Auto. To minimize
the length of time it takes to find the bottom, you can select a
depth to limit the search for the bottom. The device will not
search for the bottom deeper than the selected depth.
Traditional, Garmin ClearVü, and SideVü Transducer
Installation Settings
From a Traditional, Garmin ClearVü, or SideVü sonar view,
select Menu > Sonar Setup > Installation.
Transmit Rate: Sets the length of time between sonar pings.
Increasing the transmit rate increases the scroll speed, but it
may also increase self-interference.
Reducing the transmit rate increases the spacing between
transmit pulses and can resolve self-interference. This option
is available on the Traditional sonar view only.
Transmit Power: Reduces transducer ringing near the surface.
A lower transmit power value reduces transducer ringing, but
can also reduce the strength of the returns. This option is
available on the Traditional sonar view only.
Filter Width: Defines the edges of the target. A shorter filter
more clearly defines the edges of the targets but may allow
more noise. A longer filter creates softer target edges and
may also reduce noise. This option is available on the
Traditional sonar view only.
Flip Left/Right: Switches the SideVü view orientation from left
to right. This option is available on the SideVü sonar view
only.
Restore Sonar Defaults: Restores the sonar settings to the
factory default values.
Allows you to change the transducer, view details about the
transducers, and save details to a memory card.
Sonar Frequencies
NOTE: The frequencies available depend on the device and
trandsucers being used.
Adjusting the frequency helps adapt the sonar for your particular
goals and the present depth of the water.
Higher frequencies use narrow beam widths, and are better for
high-speed operation and rough sea conditions. Bottom
definition and thermocline definition can be better when using a
higher frequency.
Lower frequencies use wider beam widths, which can let the
fisherman see more targets, but could also generate more
surface noise and reduce bottom signal continuity during rough
sea conditions. Wider beam widths generate larger arches for
fish target returns, making them ideal for locating fish. Wider
beam widths also perform better in deep water, because the
lower frequency has better deep water penetration.
CHIRP frequencies allow you to sweep each pulse through a
range of frequencies, resulting in better target separation in
deep water. CHIRP can be used to distinctly identify targets, like
individual fish in a school, and for deep water applications.
CHIRP generally performs better than single frequency
applications. Because some fish targets may show up better
using a fixed frequency, you should consider your goals and
water conditions when using CHIRP frequencies.
Some transducers also provide the ability to customize preset
frequencies for each transducer element, which enables you to
change the frequency quickly using the presets as the water and
your goals change.
Viewing two frequencies concurrently using the split-frequency
view allows you to see deeper with the lower frequency return
and, at the same time, see more detail from the higher
frequency return.
NOTICE
Always be aware of local regulations on sonar frequencies. For
example, to protect orca whale pods, you might be prohibited
from using frequencies between 50 to 80 khz with in ½ mile of
an orca whale pod. It is your responsibility to use the device in
compliance with all applicable laws and ordinances.
Selecting the Transducer Frequency
NOTE: You cannot adjust the frequency for all sonar views and
transducers.
You can select which frequencies appear on the sonar screen.
NOTICE
Always be aware of local regulations on sonar frequencies. For
example, to protect orca whale pods, you might be prohibited
from using frequencies between 50 to 80 khz with in ½ mile of
an orca whale pod. It is your responsibility to use the device in
compliance with all applicable laws and ordinances.
1
From a sonar view, select Menu > Frequency.
2
Select a frequency suited to your needs and water depth.
For more information on frequencies, see Sonar
Frequencies, page 31.
Creating a Frequency Preset
NOTE: Not available with all transducers.
You can create a preset to save a specific sonar frequency,
which allows you to change frequencies quickly.
1
From a sonar view, select Menu > Frequency.
2
Select Manage Frequencies > New Preset.
3
Enter a frequency.
Turning On the A-Scope
NOTE: This feature is available in the Traditional sonar views.
Sonar Fishfinder 31