
User manual
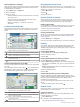


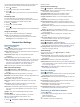
Table Of Contents
- Table of Contents
- Getting Started
- Vehicle Profiles
- Dash Cam
- Driver Awareness Features and Alerts
- Navigating to Your Destination
- Finding and Saving Locations
- Points of Interest
- Finding Trucking Points of Interest
- Finding a Location Using the Search Bar
- Finding a Location by Category
- Location Search Results
- Changing the Search Area
- Custom Points of Interest
- Parking
- Search Tools
- Viewing Recently Found Locations
- Viewing Current Location Information
- Adding a Shortcut
- Saving Locations
- Using the Map
- Hands-Free Calling
- Traffic
- Using the Apps
- Garmin fleet Settings
- Device Information
- Device Maintenance
- Troubleshooting
- Appendix
- Index

Road Condition Warnings
Risk of grounding
Lateral wind
Narrow road
Sharp curve
Steep down hill
Tree overhang
Alerts
Weigh station
Road not verified for trucks
Trip Information
Viewing Trip Data from the Map
Before you can view trip data on the map, you must add the tool
to the map tools menu (Enabling Map Tools, page 10).
From the map, select > Trip Data.
Customizing the Trip Data Fields
Before you can customize the data that appears in the trip data
map tool, you must add the trip data tool to the map tools menu
(Enabling Map Tools, page 10).
1
From the map, select > Trip Data.
2
Select a trip data field.
3
Select an option.
The new trip data field appears in the trip data map tool.
Viewing the Trip Information Page
The trip information page displays your speed and provides
statistics about your trip.
NOTE: If you make frequent stops, leave the device turned on,
so it can accurately measure elapsed time during the trip.
From the map, select Speed.
Viewing the Trip Log
Your device keeps a trip log, which is a record of the path you
have traveled.
1
Select > Navigation > Map & Vehicle > Map Layers.
2
Select the Trip Log check box.
Resetting Trip Information
1
From the map, select Speed.
2
Select > Reset Field(s).
3
Select an option:
• When not navigating a route, select Select All to reset
every data field except the speedometer, on the first page.
• Select Reset Trip Data to reset the information on the trip
computer.
• Select Reset Max. Speed to reset the maximum speed.
• Select Reset Trip B to reset the odometer.
Viewing Upcoming Traffic
You can view traffic incidents coming up along your route or
along the road on which you are traveling.
1
While navigating a route, select > Traffic.
The nearest upcoming traffic incident appears in a panel on
the right side of the map.
2
Select the traffic incident to view additional details.
Viewing Traffic on the Map
The traffic map shows color-coded traffic flow and delays on
nearby roads.
1
From the main menu, select > Traffic.
2
If necessary, select > Legend to view the legend for the
traffic map.
Searching for Traffic Incidents
1
From the main menu, select > Traffic.
2
Select > Incidents.
3
Select an item in the list.
4
If there is more than one incident, use the arrows to view
additional incidents.
Customizing the Map
Customizing the Map Layers
You can customize which data appear on the map, such as
icons for points of interest and road conditions.
1
Select > Navigation > Map & Vehicle > Map Layers.
2
Select the check box next to each layer you want to show on
the map.
Changing the Map Data Field
1
From the map, select a data field.
NOTE: You cannot customize Speed.
2
Select a type of data to display.
Changing the Map Perspective
1
Select > Navigation > Map & Vehicle > Driving Map
View.
2
Select an option:
• Select Track Up to display the map in two dimensions (2-
D), with your direction of travel at the top.
• Select North Up to display the map in 2-D with north at
the top.
• Select 3-D to display the map in three dimensions.
Hands-Free Calling
NOTE: While most phones are supported and can be used, it
cannot be guaranteed that a particular phone can be used. All
features may not be available for your phone.
Using Bluetooth wireless technology, your device can connect to
your mobile phone to become a hands-free device. While
connected, you can place or receive calls using your device.
Pairing Your Phone
Before you can use hands-free calling, you must pair your
device with a compatible mobile phone.
1
Place your phone and your Garmin fleet device within 3 m
(10 ft.) of each other.
2
On your phone, enable Bluetooth wireless technology, and
set your phone to be visible or discoverable to other devices.
For more information, see the owner's manual for your
phone.
3
On your Garmin fleet device, select > Bluetooth.
4
Select the toggle switch to turn on Bluetooth technology.
A list of nearby Bluetooth devices appears.
5
Select your phone from the list.
6
If necessary, verify the code displayed on your phone
matches the code displayed on your Garmin fleet device.
7
Select Pair.
Hands-Free Calling 11