
User manual
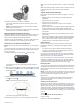


Table Of Contents
- Table of Contents
- Introduction
- Training
- My Stats
- Navigation
- Bluetooth Connected Features
- Wireless Sensors
- History
- Customizing Your Device
- Device Information
- Troubleshooting
- Appendix
- Index

The recovery time appears. The maximum time is 4 days,
and the minimum time is 6 hours.
About VO2 Max. Estimates
VO2 max. is the maximum volume of oxygen (in milliliters) you
can consume per minute per kilogram of body weight at your
maximum performance. In simple terms, VO2 max. is an
indication of athletic performance and should increase as your
level of fitness improves. VO2 max. estimates are provided and
supported by Firstbeat. You can use your Garmin device paired
with a compatible heart rate monitor and power meter to display
your cycling VO2 max. estimate.
Getting Your VO2 Max. Estimate
Before you can view your VO2 max. estimate, you must put on
the heart rate monitor, install the power meter, and pair them
with your device (Pairing Your Wireless Sensors, page 8). If
your device was packaged with a heart rate monitor, the device
and sensor are already paired. For the most accurate estimate,
complete the user profile setup, and set your maximum heart
rate (Setting Up Your User Profile, page 4).
NOTE: The estimate may seem inaccurate at first. The device
requires a few rides to learn about your cycling performance.
1
Ride at a steady, high intensity for at least 20 minutes
outdoors.
2
After your ride, select Save Ride.
3
Hold .
4
Select My Stats > VO2 Max.
Your VO2 max. estimate appears as a number and position
on the gauge.
VO2 max. data and analysis is provided with permission from
The Cooper Institute
®
. For more information, see the
appendix (VO2 Max. Standard Ratings, page 13), and go to
www.CooperInstitute.org.
Tips for Cycling VO2 Max. Estimates
The success and accuracy of the VO2 max. calculation
improves when your ride is a sustained and moderately hard
effort, and where heart rate and power are not highly variable.
• Before your ride, check that your device, heart rate monitor,
and power meter are functioning properly, paired, and have
good battery life.
• During your 20 minute ride, maintain your heart rate at
greater than 70% of your maximum heart rate.
• During your 20 minute ride, maintain a fairly constant power
output.
• Avoid rolling terrain.
• Avoid riding in groups where there is a lot of drafting.
Pairing Your Wireless Sensors
Before you can pair, you must put on the heart rate monitor or
install the sensor.
Pairing is the connecting of ANT+ or Bluetooth wireless sensors.
For example, connecting a heart rate monitor with your Garmin
device.
1
Bring the device within 3 m (10 ft.) of the sensor.
NOTE: Stay 10 m (33 ft.) away from other riders' sensors
while pairing.
2
Hold .
3
Select Sensors > Add Sensor.
A list of available sensors appears.
4
Select one or more sensors to pair with your device.
When the sensor is paired with your device, the sensor status is
Connected. You can customize a data field to display sensor
data.
Training with Power Meters
• Go to www.garmin.com/intosports for a list of ANT+ sensors
that are compatible with your device (such as Vector
™
).
• For more information, see the owner's manual for your power
meter.
Calibrating Your Power Meter
Before you can calibrate your power meter, you must install it,
pair it with your device, and begin actively recording data with it.
For calibration instructions specific to your power meter, see the
manufacturer's instructions.
1
Hold .
2
Select Sensors.
3
Select your power meter.
4
Select Options > Calibrate.
5
Keep your power meter active by pedaling until the message
appears.
6
Follow the on-screen instructions.
Pedal-Based Power
Vector measures pedal-based power.
Vector measures the force you apply a few hundred times every
second. Vector also measures your cadence or rotational
pedaling speed. By measuring the force, the direction of force,
the rotation of the crank arm, and time, Vector can determine
power (watts).
Situational Awareness
Your Edge device can be used with Varia
™
smart bike lights and
rearview radar to improve situational awareness. See the
owner's manual for your Varia device for more information.
NOTE: You may need to update the Edge software before
pairing Varia devices (Updating the Software Using Garmin
Express, page 12).
History
History includes time, distance, calories, speed, lap data,
elevation, and optional ANT+ sensor information.
NOTE: History is not recorded while the timer is stopped or
paused.
When the device memory is full, a message appears. The
device does not automatically delete or overwrite your history.
Upload your history to Garmin Connect periodically to keep track
of all your ride data.
Viewing Ride Details
1
Hold .
2
Select History > Rides.
3
Select a ride.
8 History