
Cut Sheet


Voice • Data • Video
USA 800.624.4320 l fax 800.799.3779 l www.gardnerbender.com
CANADA 905.564.5749 l fax 905.564.0305
185
Terminating Coaxial Cable − Terminology
Creating a Coax Cable
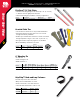
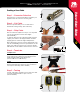
Step 1 – Connector Selection
Select the type of connector that will be needed for your
application from the connector selection guide.
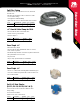
Step 2 – Cut Cable
Note: It is important that you use a round cutter to
maintain the cable geometry. (Part #: GC-330)
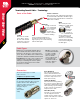
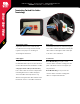
Step 3 – Strip Cable
Note: F-Connectors require a two step
1
/4" x
1
/4" strip, make
sure you are using an F-connector wire stripper.
(Part #: SE-398)
To strip the cable place the cable in the blade end of the
stripper, press down on the stripper handle, and while
applying pressure rotate the stripper multiple times.
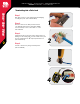
Before placing the connector over the stripped end of the
wire the metal braiding needs to be pushed back over the
jacket of the cable, then push on the connector until the
white dielectric is even with the center hole of the connector.
Step 4 – Terminate
Compression
Insert the cable, with the compression connector placed
on the end, into the compression tool and squeeze the
handle until the handle is flush with the tool.
(Part #: COM-310 or COM-320 Pro)
Crimp
Strip cable, fold braid back. Insert the cable, push white
dielectric until flush with center hole. Place connector in
tool. Squeeze and crimp. (Part #: GS-389)
Step 5 – Testing
Test the cable with a continuity tester to make sure cable
is properly terminated with no opens or shorts.
(Part #: TT64202)
1
2
3
5
¼"
¼"
4